Friday 31 August 2012

NOTD Barielle Delicate Dancer

I originally posted about the box set this polish came from here

This beauty has been featuring on my nails recently when I can't decide which colour to go for, a nude is always the best option then!


It's called Delicate Dancer and true to the name is a very delicate colour.

I normally like a solid block of whatever colour I'm painting and whilst this polish is very thin, the effect is still really nice and natural.


I've never heard of Barielle before so had no idea if it was any good but I think for a collection of Bridal colours they hit the nail on the head.

This colour is most definitely similar to what I would choose to wear on my wedding day!


The colour did require a few coats but as each was thin it dried quickly and the coats were not streaky.

I will definitely be using this one up over the next few weeks when the weather can't decide what it is doing!
And it will look just as good on toes as it will on fingers.


What do you think of this Barielle nude colour? Are you a fan of peachy nudes or pinky nudes?


L xxx

SHARE:

Saturday 11 August 2012

NOTD Beetle Juice and China Glaze

Today is the end of our 21 day nail challenge but after spotting Make up Savvys 15 day nail challenge we've decided to extend it till tomorrow as we both wanted to try tomorrows theme (film inspired).
Today's nails are metallic. I kept the simple and did my favourite type of manicure a plain accent nail. 


I used Nail Envy Maintenance (my favourite base coat ever and the best in mu opinion, I read somewhere a while ago after using the original nail envy to switch the the maintenance version.) The colours I choose were China Glaze Coconut Kiss purchased from eBay ages ago and Models Own Beetle Juice Purple Blue purchased from the models own website. They are also available in boots.. 


Coconut Kiss is a gorgeous metallic purple. As with all China Glaze polishes it is a gorgeous finish and perfect in two coats.


Purple Blye is a metallic purpley brown blue colour and looks different in different lights. This polish I had an issue with. I bought it at Christmas time and have used it once since buying it and it has gone very gloopy and thick already. I'm not sure if this is just due to the consistency of beetle juice nail varnishes or all models own ones do this. It turns different colours in different lights and seems to have a fine glitter imbedded in it.


I really like the contrast between these two colours and how they go together. Coconut kiss is a colour I need to use more I really love the colour it comes out on the nails.


Have you enjoyed are NOTDs over the past three weeks? I'm going to miss having an excuse to paint my nails so much. Though I have been bad this week and bit all my nails off. I'm so annoyed at myself. I've not bitten them in over a year now and this week for some reason I've gradually bit them all down to stubs :(.

Love M

xxx


SHARE:

Thursday 9 August 2012

NOTD: Asiatique Red

Today following Make Up Savvy's 15 Days of Nails we decided to join again and this is my current favourite red:


My camera battery unfortunately died so I've had to use my phone so the above photo is taken without a flash and the one below is with flash so you can see the colour better.

This is Mac's Asiatique which i picked up from a Cosmetics Company store in Swindon a few months ago.


It's a beautiful bold red and these pictures were taken after one coat.

However I am a little careless and have chipped it already so will be applying another an a top coat as soon as I've finished this post!

It's such a stunning red colour, I'm really glad i picked it up as you always need a red in your collection that's like this.

It's not too orange, not too pink but not too blood red either, in fact its the best true red in my collection!


What do you think? Do you like Mac nail polishes?

This one is my first one and I'm really impressed with the consistency and it didn't take long to dry either :)

Make Up Savvy's blog can be found here, check out the other designs from the past few days including some from us!


L xxx
SHARE:

Wednesday 8 August 2012

NOTD Leopard Print Nails

Today's nails are another on from Makeup Savvy's 15 day nail challenge. Today is leopard print. Leopard print nails is something I love but I've never tried it before. I'm not great at detail nail art and don't have a nail art pen which I think would make it easier. 


But here's my attempt. I used Max Factor Max Effect nail varnish in shade Ivory which is in fact a gorgeous glittery gold. I really like this shade.


Next I used Look Nail pop in the kimono which is a khaki shade with a hint of gold in some lights. This will definitely be used a lot through autumn. I'm really liking this nail varnish and really want more Look ones now. With the kimono I put little blobs (great describing word there) of nail varnish on each ring finger. (I'm sure you've seen by now I've not mastered nail art on all my nails) I put 5 to 6 blobs on each finger. Try not to make them perfectly round.


The next step is easiest done with a nail art pen, but if you are like me and don't have one a dotting tool, cocktail stick of kirby grip can be used. I used OPI Lincoln After Dark for the outline of the print, the trick is to add little dots and lines around the circles but not completely outline them.


I really want to try this more and get it a little neater next time and on all nails. The great thing about this is it can be done in lots of different colours too. What do you think of leopard? Is it one you'll try? Any tips for me?

Love M

xxx

SHARE:

Tuesday 7 August 2012

NOTD: China Glaze Capitol Colours

I am sure that most of you have seen these long ago when they came out, but I for one completely missed the boat and when I browsed the Ulta website before going to America added them straight to my list!

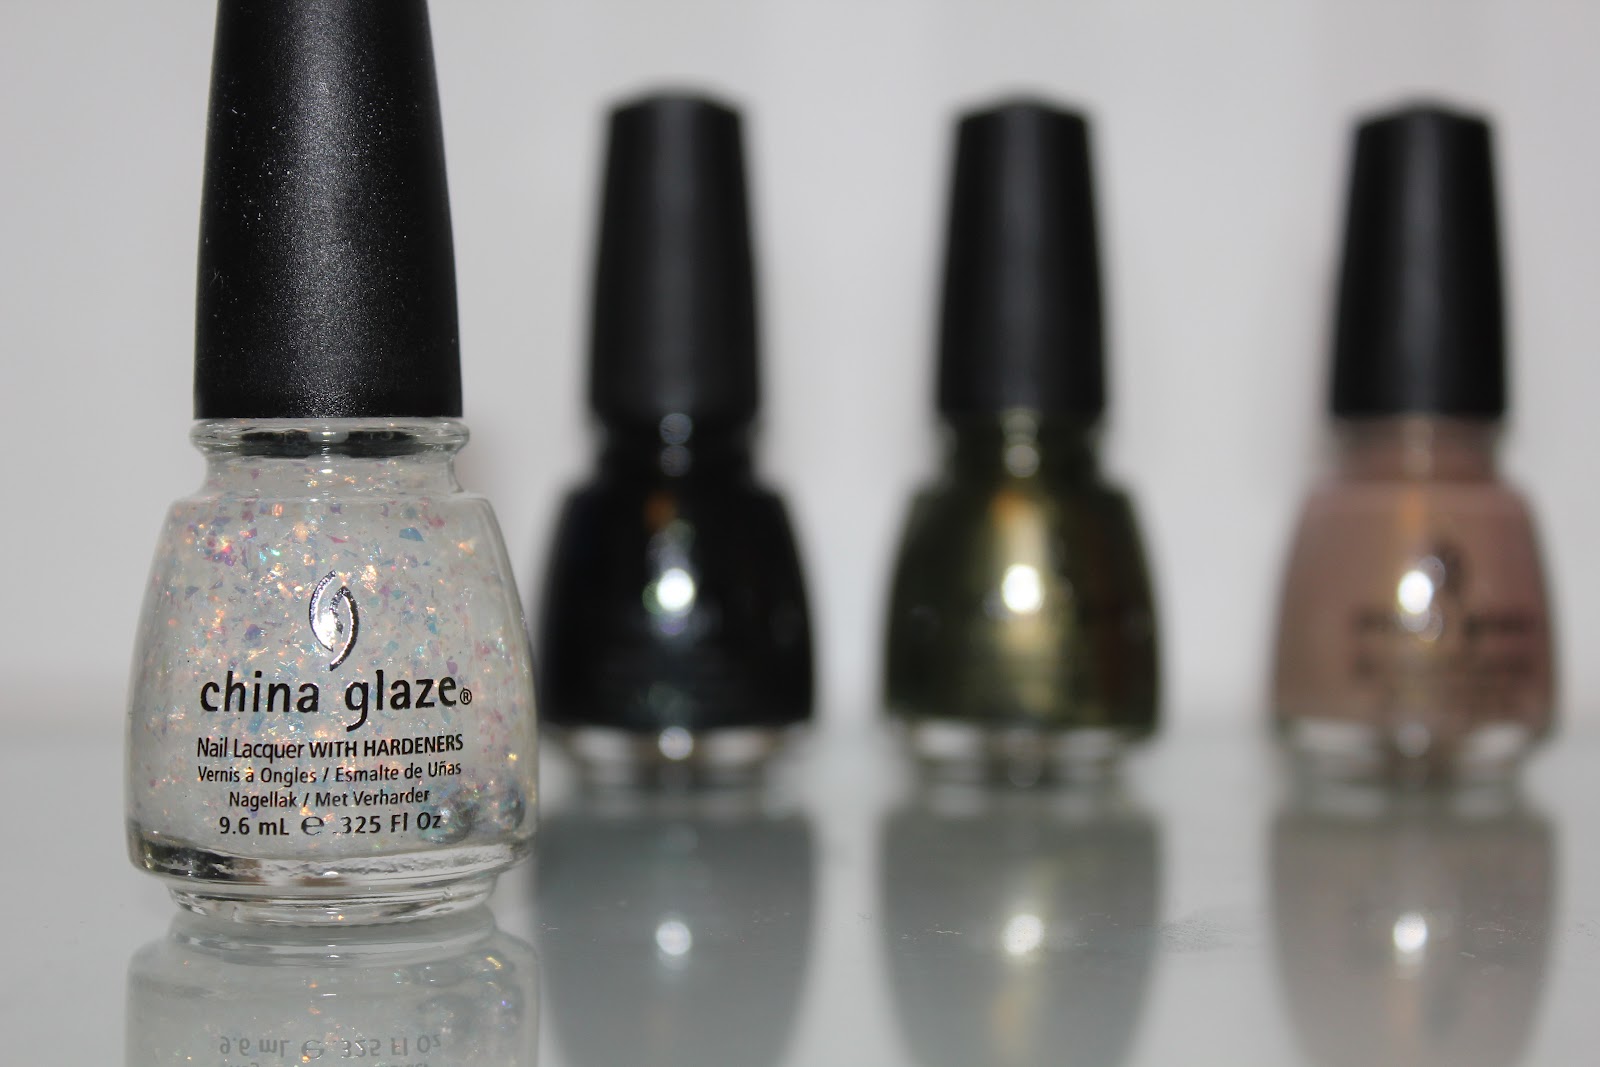
They are of course China Glaze's Capitol Colours from the book/film the Hunger Games.

I absolutely love it when companies do special editions for particular films and to be honest I fell in love with the Hunger Games and managed to read all 3 books in a week as I couldn't put them down!


Because of this I obviously had to buy them as I'm such a fan even though I have similar colours already ha,

Though when they're lined up in packaging like that who can refuse??!

There are a lot of photos in this post so be warned :)


You can see the names of the polishes here, Luxe and Lush, Smoke and Ashes, Agro, and Fast Track.

I was super excited to try out smoke and Ashes, and true to form as on everyone elses blog, was hard to photograph!


This colour is opaque in 2 coats, and although it might just look like a glittery black it is so sparkly and has green coloured flecks in it too that take it to a whole new level.


These aren't very neat as i was far too excited to get this one onto my nails!

But you can see the amazing glittery effect below:


Perfectly representing District 12, (the mining district) it gives a glamorous appeal to coal don't you think?!

Hopefully you'll be able to see in the photo below the amazing green colour that comes through in natural light.

I am fully in love with this colour and am a little gutted I only have the small size...


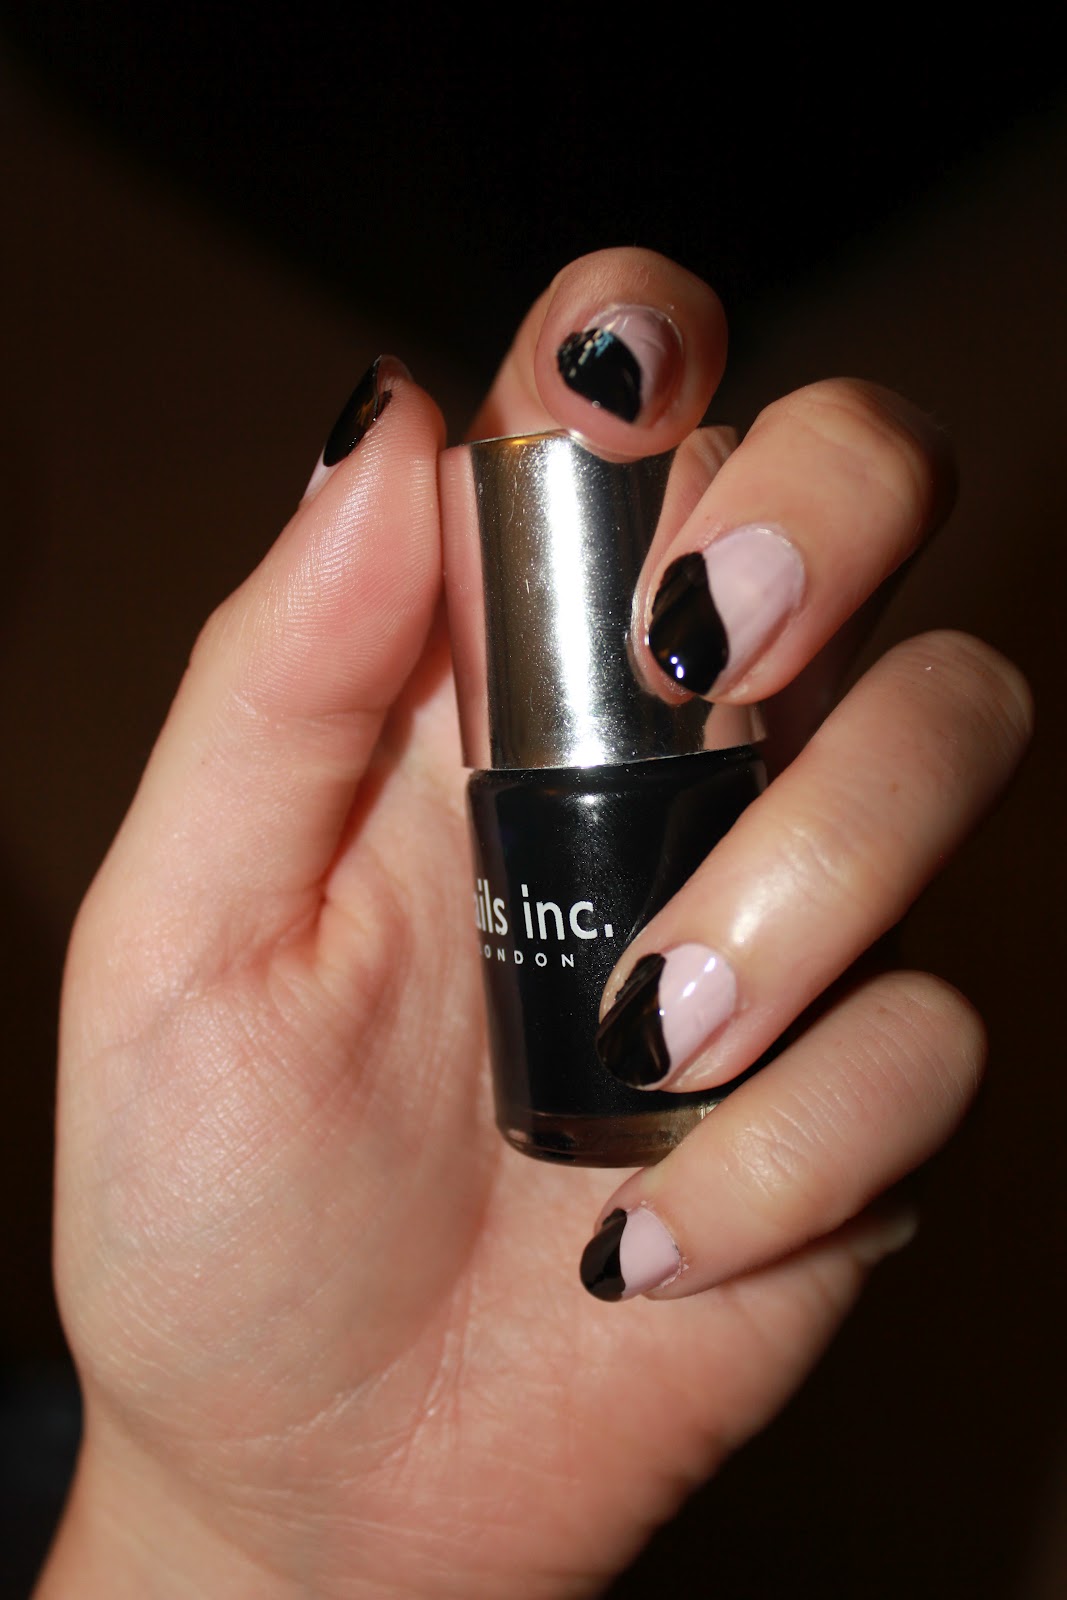
Next up is Luxe and Lush:


This polish is very similar to one of the Christmas specials I bought from China Glaze last December (Snow Globe) except this has flakes of glitter as opposed to perfect hexagonal shapes.


This is one coat of Luxe and Lush on top of Essie's Sand Tropez.

The different sized particles show up well even on a nude base


The second coat shows this up even more and I can imagine this looking amazing on your nails for a night out, I expect some more posts will feature using this soon!


Next up is Agro:


This one amuses me as the name sounds so hard but actually it's for the District of Agriculture.
Initially I thought this was going to be similar to the Chanel Peridot and have the sort of petrol look about it.

But it's actually a gorgeous khaki green colour with a slight metallic look to it:


This was also only one coat, and the colour is beautifully opaque.
I wasn't sure I would like this one, but it has surprised me and I can see me wearing it a lot in the Autumn and Winter months.


Lastly is Fast Track:


This colour I wasn't sure I'd like either, as it looked a little dark brown-ish for my skin tone.

But again I was surprised as it wasn't as dark as I expected and the gold shimmer is really small and not too glittery at all


Of all of the colours I think this is the one I will use least as it isn't quite right for my skin colour.

However it might be better when layered over another nude so I will be trying that so as not to waste it!


What do you think of the Capitol Colours collection? Do you love the limited editions that China Glaze bring out?

I certainly do! I will be eagerly waiting for any upcoming ones and putting my order in early from now on!

L xxx


SHARE:

Monday 6 August 2012

NOTD Glitter Nails

As we both love China Glaze Dollhouse we decided to take part in another of Fee from Make up Savvy 15 days of Nails. (link here)


Today is day 6 in her 15 day challenge and is any glitter nail design. Both L and I love our Doll house it's a baby pink chunky glitter. I think one of us has a fake though as we both have different size glitter unless two different sizes were released.


Mine is a rather larger glitter, which I love. I love huge glitter nail varnishes. As my nail tape arrived today from Hong Kong (eBay special found here for £1.19) I decided to do a design that involved that.


My nails were already painted in Nails Inc Piccadilly Circus and as I couldn't be bothered to remove it I just painted the glitter over the top.

I used one coat and dabbed it on as opposed to just painting it so I got the glitter where I wanted it and covering the nail completely. My bottle is now almost empty so the polish is thickening up now. I need to get a new one.

After I'd painted them with the glitter I cut my stripping tape into small pieces and stuck it on the nail in different directions, making sure my glitter base was completely dry. I've tried a tape manicure before but with normal sellotape here. It's much easier with the proper tape as it's thinner. 

I decided to paint them with grey over the top today instead of black to see what it looked like with different colours. I also think this particular one would look great with Nails Inc Piccadilly Circus over the top again.


Once the top layer of the nails have dried it's time to gently pull up the tape. To reduce tugging it helps to pull them up in the opposite way to which you laid them on your nails. You can see I was a little impatient with mine.


This is my favourite nail! I love this look and will definitely try it more. Do you have stripping tape?

Love M

xxx


Doll House is most definitely my favourite glitter of ALL TIME!

Which is saying something as a person who blogs about nails all the time.

This is a design I've done similar of before, but never with a glitter (you can find it here)


First I painted my nails with a base coat (Revlon's Post Trauma Nail Treatment) and a pale pink colour which is from 17 but I can;t remember the name sorry.


Then I used Nails Inc's Black Taxi to create a V shaped pattern in 2 stripes on the nail.
You can do them both at the same time if you want, though it is easier (but longer!) to them in 2 different goes.


Once this has fully dried I applied Doll House in the same way.
I needed 2 coats of this as mine is running out slowly but surely!

And also I love the way it looks when it's more glitter the better!

I've run out of cotton buds to clean up the edges so excuse the messy edges please :)


What do you think of our Doll House designs?

I think I'm going to have to pick up some tape to give some designs a go!

L xxx
SHARE:

Sunday 5 August 2012

NOTD Barry M Chameleon

I'm loving doing our 21 days of nails. I'm linking the fact it's giving me the excuse to paint my nails so much as well as giving me the excuse to maybe purchase a few new nail varnishes. This was one I picked up the other  day and my first Barry M purchase along with the magnetic one featured here.

I couldn't resist getting this as I thought it would make and interesting polish and make nail art so simple. I picked up the Chameleon pink shade and is £3.99 from boots


I was so impressed with this polish. This is the colour after one coat. Fully opaque and a gorgeous metallic rose pink shade. I really need to try more Barry M polishes. I'm eyeing up a gorgeous blue shade and the Britannia special glitter one.


The chameleon polishes work like those magic markers I'm sure you all had as kids I loved mine. You add ordering top coat to the polish and they change colour. What a cool effect. I loved the pink shade so much I almost didn't but after seeing L's Chanel inspired nail art she posted here I was keen to try a similar effect. L told me it gets easier. Mine isn't too neat but you get a good idea of the colour change achieved from applying clear polish.


I'm loving the reverse French effect look. It looks really effective and is a really simple design to do.


I definitely want some more of these polishes, especially the lilac one. I think some simple effect nail art looks can be achieved with these polishes. The purple is a really pretty shade too if left just that colour.


Have you tried any of these colour changing nail varnishes?

Love M

xxx

SHARE:

Saturday 4 August 2012

NOTD: Galaxy Nails

Galaxy nails have featured heavily on blog posts around the world for the past year or so.

I've never actually tried it as I thought it would be far to complicated but after trying out a few other designs I've decided to up my game!

Having already started out our 21 Days of Nails and then also seeing that Fee at Make Up Savvy has started a 15 Day Nail Challenge I thought it would be a great idea to combine the two and test out a Galaxy nail design today.

Hopefully she will link us in her post, but her blog can be found here for any other posts she puts up :)

Onto my designs....I decided to do two as I really got into the swing of things after trying out the dark galaxy nail design:


I started by painting my nails with a very thin coat of No7 Beautifully Black which is a silver glittery black, and then using Max Factor's Fantasy Fire and Odyssey Blue to create a dark glittery base representative of a mystical night sky.


After this I used my latest purchases of the China Glaze Neon colours, Pool Party and Turned Up Turquoise to create swirls and patterns along with Nails Inc's Cambridge Terrace to give a starry effect.


I then finished this with a top coat of China Glaze's Hunger Games edition of Luxe and Lush which will feature in an upcoming post also.

After I managed to cope with my attempt at galaxy nails for the first time, I removed my first attempt and thought I'd go for a more summery edition.....even though the weather isn't really reflecting the expected season! Sigh!


I started by using a pale blue base (Rimmel's Sweet as Sugar) and also the same Max Factor Fantasy Fire and Odyssey Blue, and Nails Inc's Cambridge Terrace to create a similar effect as before but in a lighter colour palette.


After this I used a coat each of the Saffron glitter nail polish in both silver and gold to give the best starry effect you could ever want with different shaped and sized glitter particles. 

I actually found this polish by reading Fee's blog in the first place so I owe her this big time, you can find it on ebay here for £2.20 delivered and here are also some fabulous dupes of other polishes...bargain!


What do you think of my attempts? Are you a fan of galaxy nails?

I'm so impressed with myself, gone are the days when I stick to my simple manicure. The world is my oyster now ;)

Take a look at Make Up Savvy's blog, it's amazing!

L xxx

SHARE:
© The CSI Girls. All rights reserved.
Blogger Designs by pipdig