Monday 1 December 2014

Ted Baker False Nails

Hey All

Hope you've had a good weekend. L and I went out for a few and to watch the rugby on Saturday and then I spent Sunday cooking a roast for my housemates and others half.

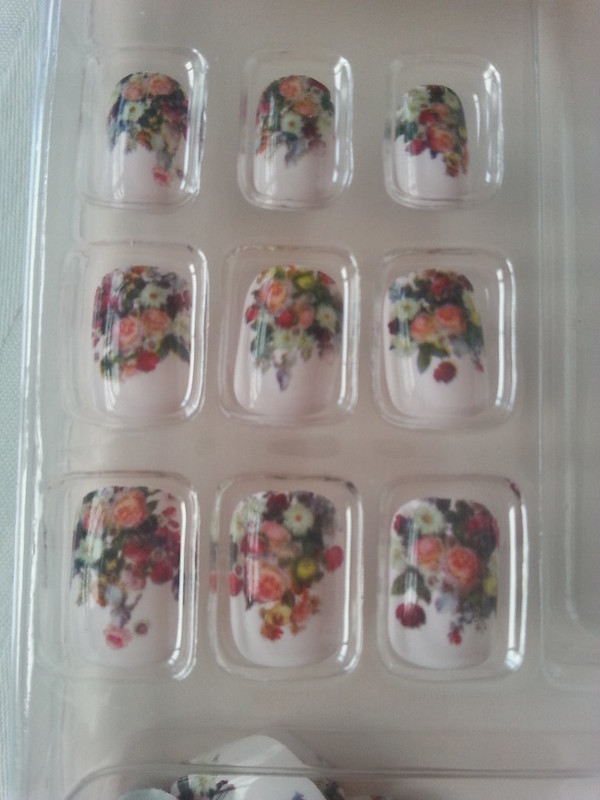
A few weeks me and the other half went to a wedding. I had originally planned to wear the nail wraps L wrote about here but I've been biting my nails again so went to boots to grab some falsies! As soon as I saw these beautiful Ted Baker ones I couldn't resist! At £8 and on 3 for 2 I needed them.

20141115_095145

20141115_095153

These instantly stuck out to me. I loved the pretty floral art and the fading pattern down the nail is how I love to apply glitter! After browsing boots.com I want to order more as they have the nail wrap styles L and I got.

20141115_095204

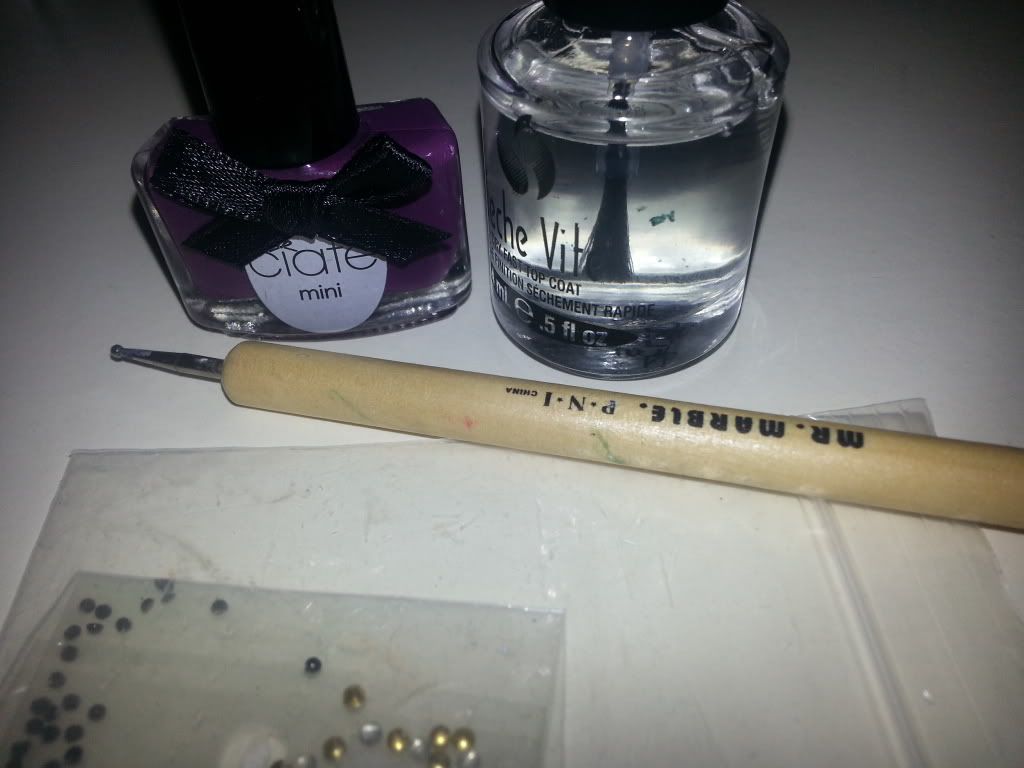
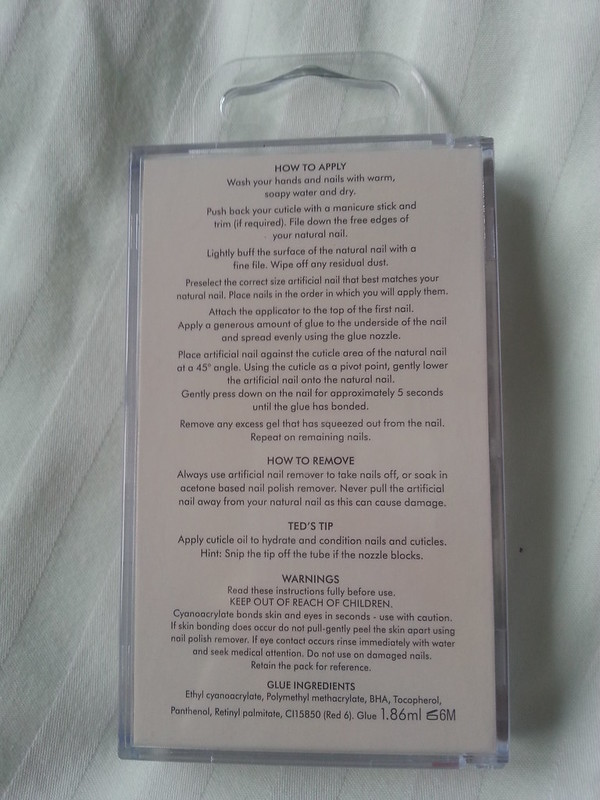
They come with glue (which I wasn't holding out much hope on. I find nail glue is like eye lash glue and my favourite only ever work!) and an applicator with a suction on to make it easy to apply the nails with out getting glue on your fingers! Let's face it whenever I use false nails I end up with glue on the underside of my hands and end up trying to bite it off! Maybe it's just me that's messy!!

20141115_095603

20141115_095608

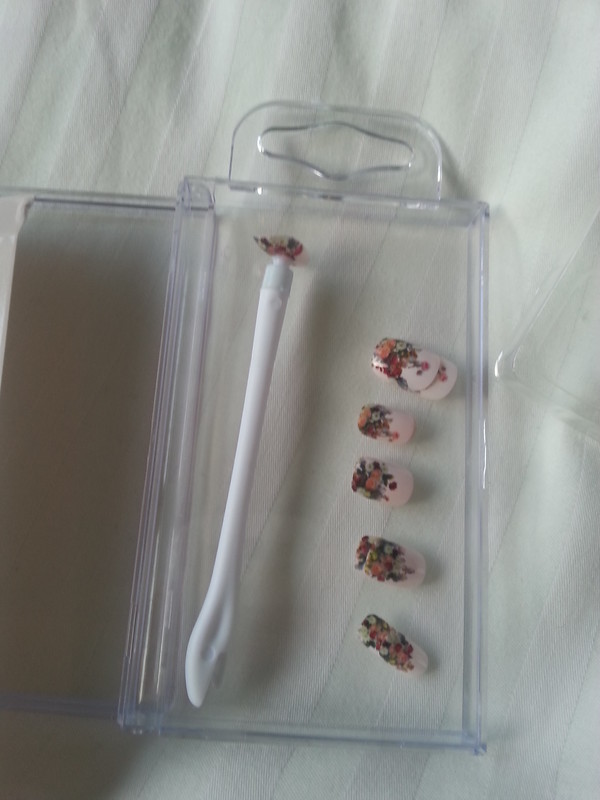
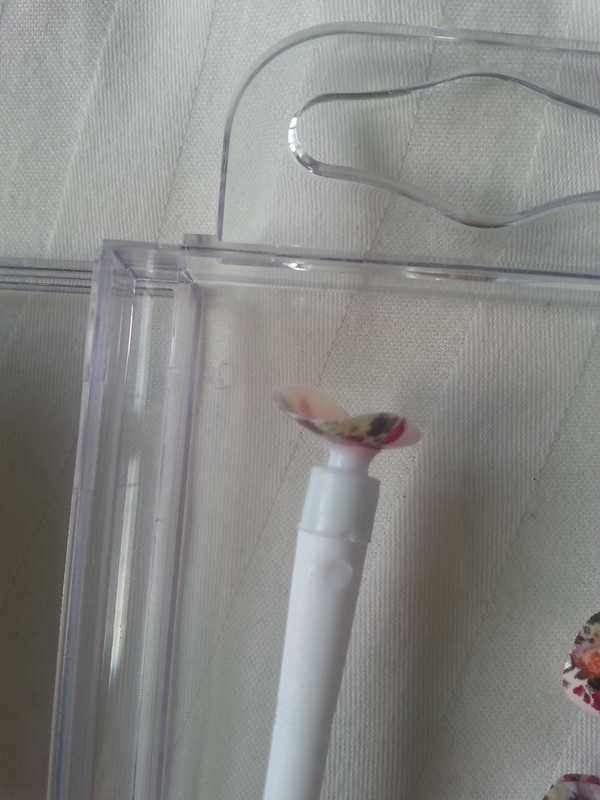
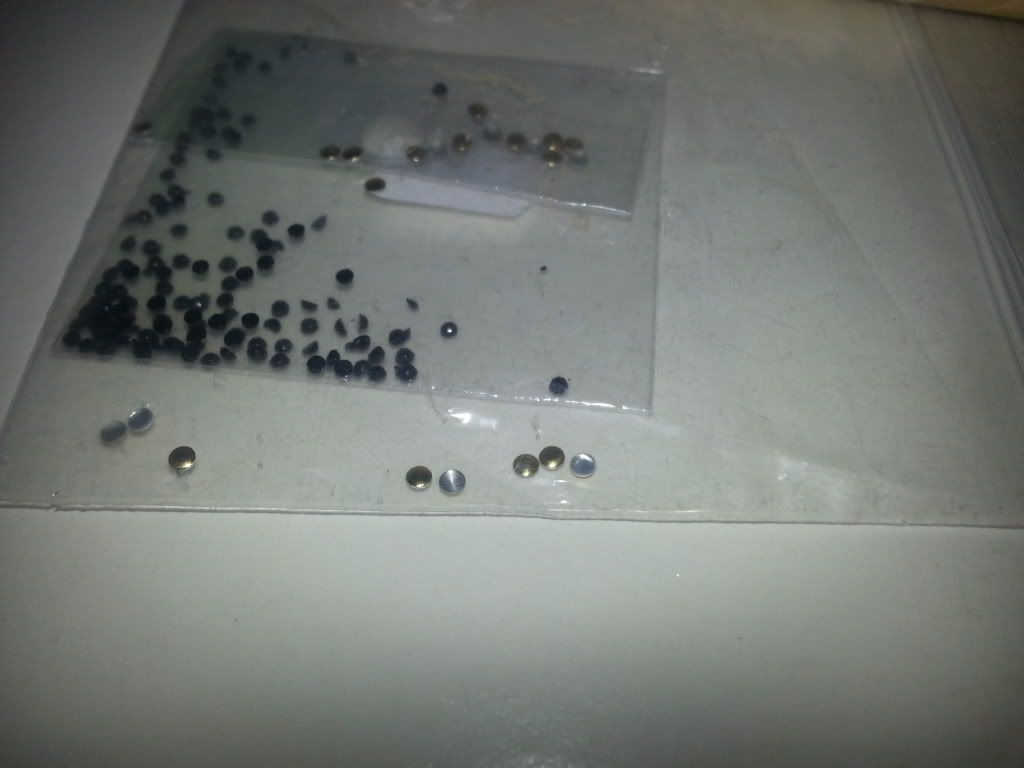
First of all I sorted the nails out and put all the ones I was going to use on the other side. One thing I loved about the set is that it had lots of small nails! I find some false nails aren't small enough for me. I then used the suction ended thing! I love this. More nail sets need to come with this!

20141115_100044

20141115_100048

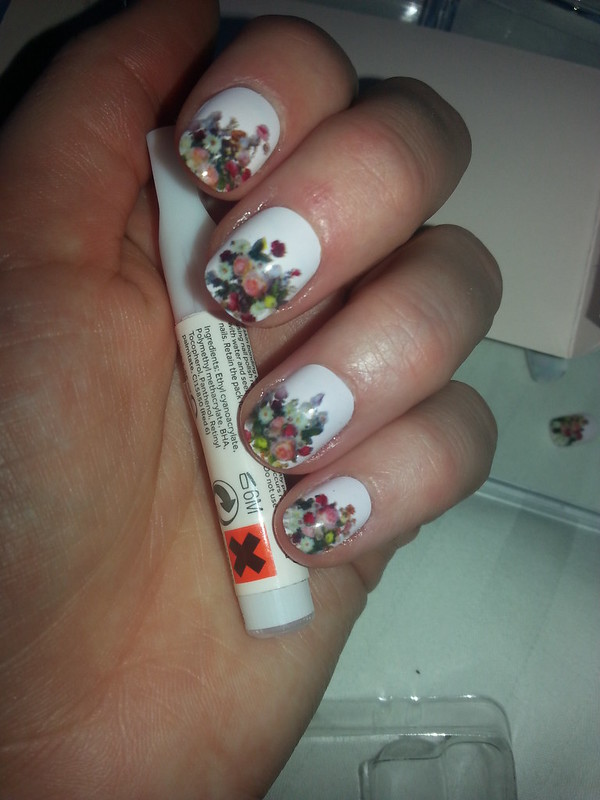
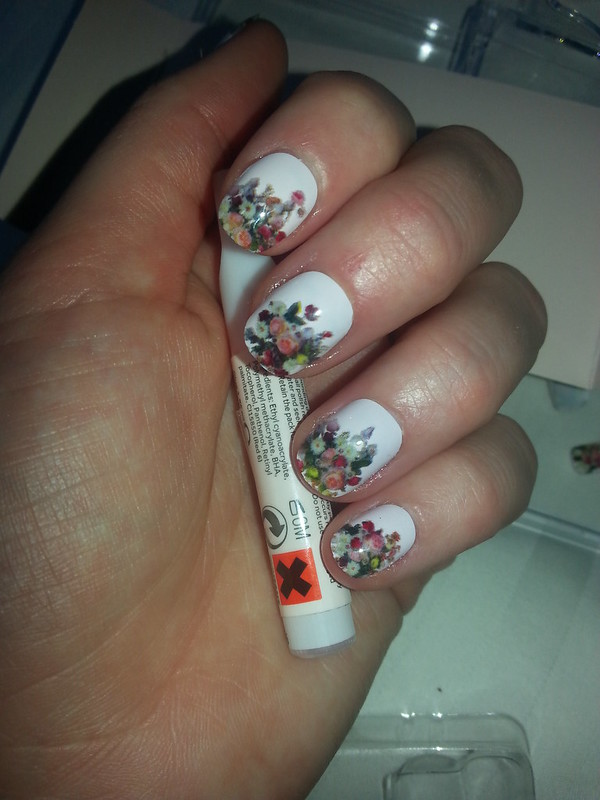
I love the way they look! They are literally the prettiest nails. They are a really great wearable length, the proof of this was also that they lasted 5 days!!! That was with working in a lab. I was so impressed! Great glue Ted Baker. They also still looked great so I've saved them to wear again! The nails also weren't too thick or curved so didn't look fake.

I've never received so many compliments on my nails! I'll be bringing these out for the Christmas parties! A perfect pretty manicure in literally 10 minutes!

20141026_152058

20141026_152041

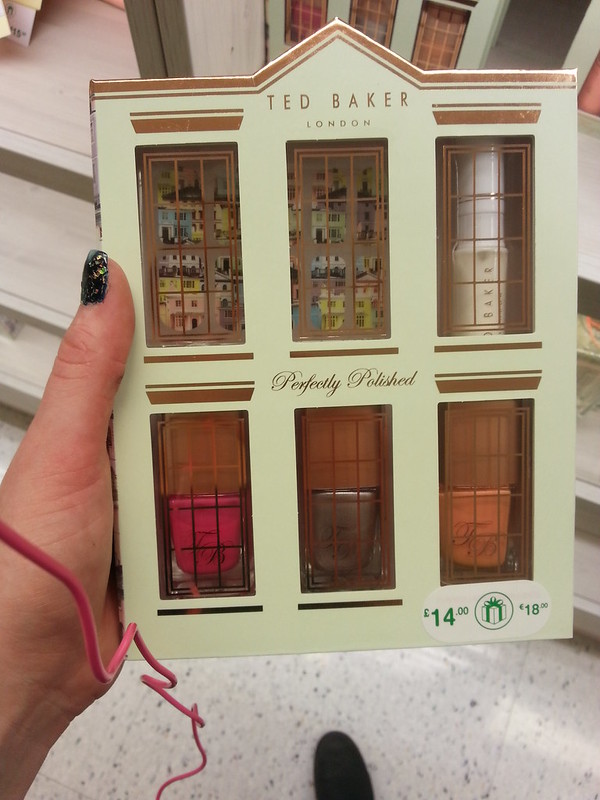
These sets are on my wishlist!


A Little selfie from the wedding!

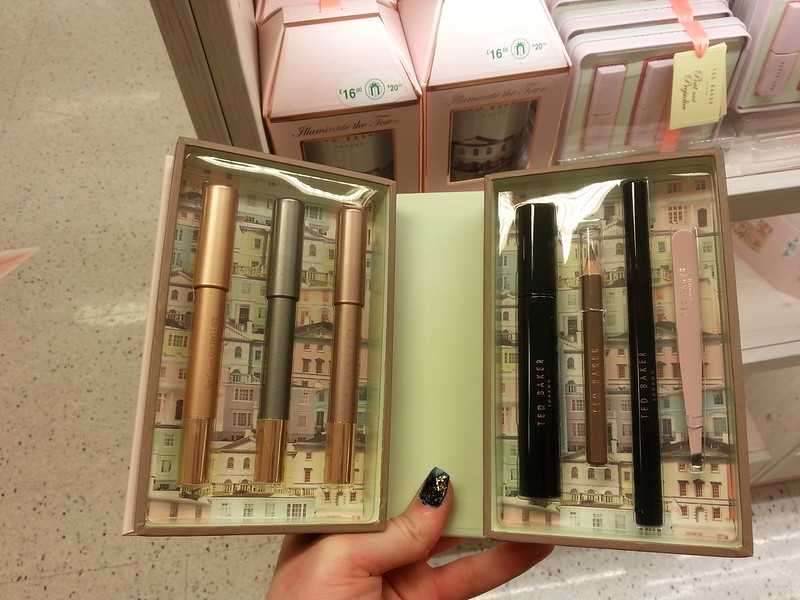
Have you tried the Ted Baker nail range? L and I have used the wraps and nail polishes! I always love the packaging it makes amazing gifts!!

Love M

xxx


SHARE:

Tuesday 27 August 2013

NOTD Dandelion Nail Art

I've been missing doing nail art lately and after seeing a really cute design on Glossy boxes twitter page I decided to have a play around.

After a bit of googling (glossy box didn't credit the person who did the nails) I find the cute design was done by Mad Manis (blog here). She's got some great nail art designs on her blog so next time I need inspiring I'll be going back.


I love how simple and cute this design is (I need a steadier hand it would seem)


I really like the sky grey/blue shade used as a base but didn't have anything similar so mixed some. I started off with a base of OPI Dating a Royal (which is a colour I absolutely adore. I forgot to photo this so used an old photo)

Untitled

Next I put a layer of No7 grey skies on top.

Untitled

And finished with a coat of Avon Blue Water Lillies. This deepened the Blue Water Lillies coloured.

Untitled

For the desigin it's self I used my models own nail art pens. Disappointingly though my black pen has become blocked and doesn't work anymore so I has to use a cocktail stick which is why my black is a little messier than I wanted. 

Untitled

I painted 3 nails with black sticks towards the tip of the nail. On top of the black sticks I then painted thin strips of white to look like the head of the dandelion.

Untitled

For the other nails I painted a few wishes on them to look like the dandelions had been blowing. I did paint my top coat too soon and smudge them a bit.

Untitled

I really like this design and really want to try it again and get it a bit neater like the brilliant original.

Are you a nail art fan? Is this something you'd try?

Love M

xxx


SHARE:

Sunday 17 March 2013

Spring Series: Hand and Nails!


Afternoon!

We're back again with another post for our Spring Series.

We've already covered Body Care and Fitness and you can read those here and here.

This week's post is dedicated to hands and nails, so if you're a bit of a manicure lover then this post is for you!


I used to be reeeeeeeeally bad at applying hand cream.
As I'm a contact lens wearer I'm always wary of using any kind of cream or soaps on my hands that may interfere when I put my lenses in, so have always avoided them like the plague.
(By this I don't mean that I never washed my hands, just avoided the thick scented ones that tend to stay on your skin!)

After realising that actually it takes 2 seconds to put my lenses in and I don't take them our for a few hours, I changed my tune and now working in a freezing cold lab I slather the stuff on!

I favour products that are organic and natural as I'm sure M does too so my favourite hand creams are from Crabtree and Evelyn, Dr Organic and L'Occitane.

008

All smell reeeeeeeeaally natural and sink straight into your skin.
As I'm new to the hand cream crew I cannot be dealing with waiting for it to sink in, unless it's when I'm getting into bed.

I also feel I should mention Soap and Glory's Hand Food as it is very popular and I also love the smell of that, but I don't feel like it is as good as it could be and obviously natural and organic wins out for me!

001

As for nails I am a firm believer in using a traditional 4 way block to file, shape, buff and shine my way to natural nails.
I have currently been using Model's Own and it's been great, love the bright neon colours too and the price is perfect at around £3.


As for nail colours for Spring....I'm a firm believer in nudes, pastels, metallics and pretty patterns.

You cannot go wrong if you pick any of the shades from the following pictures.

003
004

These are all of my favourite shades for Spring and I will making my way through each of them over the next few weeks!
As nail art is still so popular I can also see myself attempting M's Rose NOTD that she did a few days ago, or even a Spring version of my own layered polish pattern.

What are your favourite hand and nail tips? What's your favourite Spring colours?

L xxx

As with L I never used to apply hand cream as much as I should have. After realising how badly hands can age I thought it was time I took care of them. I also work in a laboratory so I have to wash my hands a lot and I find the soap very drying. As with L at first I loved Soap and Glory hand food but the more hand creams I've tried the less I like it and I think there are better out there for a better price. My favourite is an Avon Planet Spa one, in African Shea Butter. I adore the scent and it's a nice thick cream that moisturises without leaving hands feeling coated.

20130317_182643

As I wear a lot of false nails now I don't tend to my natural nails as much as I should. To see what false nails I use and the tool I can't be without you can see it in my Rose NOTD linked above. I'll be doing a how I use the cuticle trimmer post this week.

20130317_182634

I love using dotting tools and my striping tape to create different types of nail art. I'm not the type of girl who wears a plain colour much. I also favour the accent nail. For spring I think nude nails with a bright pink signature nail is a perfect look. Spring is also a great time to get out the pastel shades again.  Here are some of my favourite colours that I tend to gravitate towards for spring time!

20130317_182623

Here is some spring inspired nails we did last year.

20130317_182600

What's your favourite colour for spring?

Love M

xxx


SHARE:

Wednesday 13 March 2013

Haul

I was very lucky when I went home last weekend and my mum had been picking me up a few bits. She's an Avon lady so got me a few bits from the new catalogue to as a treat. She's definitely been helping me through my ban. Though she has been teasing me a little too by sending me great deals.  


She popped into Buyology which is a cheap shop in Somerset which sells loads of stuff. You've got to hunt for a good deal. She picked my up some pore strips which I'm very grateful for. I've been wanting some more of these for ages. I've not tried this particular brand before so I can't comment on them yet.


She also picked me up some make up sponges. They were only 99p and I'm sure I'll find a use for them. I'm going to replace the tatty one in my powder compact first off. I don't tend to use them for foundation but I may try for that soon.


I picked this out of the clearance offers. I think it was around the £3 mark. I love body lotions and go through them so quickly. Plus I love the scent of this one. I have found a great body soufflé which is currently half price at the moment. £3.50 here


This nail art tool is great. It has a very small dainty brush and a small dotting tool so will be great for any type of nail art. Best of all it's half price and only £1.50 currently here.


Lastly I got some more lipsticks. I'm such a huge lipstick lover! I can't ever resist them.


The Color Trend lipstick (the pencil type on at the front) is currently only £1.99 here. I got the shade Reddy to Go. It's perfect for chucking in my handbag as it's great for on the go applications as it's a pencil type on so it's easy to apply. It's such a pretty red on. It lasts great but does dry a little after a good few hours.

The two silver lipsticks are from Avon Perfect Kiss Range. I love the silver packaging and the attention to details. They have Avon embossed on the bullet. I have these in the shades Berry Smooch (a bright pink) and Racy Red (a gorgeous red with a hint of plummy pink). I love these. They are long lasting and amazing colour. I want more of them now. There are so many colours and they are £8.50 each but currently on 2 for £12 here.

with flash
artificial light

I think the flash shows the colour of best. Top to bottom Reddy to Go, Fuchsia Flirt and Racy Red.

A huge thank to Mummy M for spoiling me with some treats. I'm so pleased to have new lipsticks. I needed some new lipsticks. She's good to me. Have you tried many Avon products? I've tried quite a few and love their lip products!

Love M

xxx

SHARE:

Tuesday 12 March 2013

NOTD: Roses


I've seen many roses nail art tutorials so I thought it was about time I finally got around to trying it myself. I love being creative with my nails and love the look of rose nails but have never got around to doing them yet.

There are so many step by step tutorials online I've read lots so just did it from memory. I'm a nail biter. Last year was the first time I stopped so for nearly a year I actually had nice nails. You can see these in my posts from the start of this blog. Stress, uni and work has got me biting them again and I hate the way they look. Until I can kick the habit again I'm wearing false nails a lot.


False nails can get an expensive habit. I love acrylics but not the price and the damage they do, plus I like to do my own nail art. I get my nails from Boots. The kiss brand sell 100 nails for £6.49 (here) I can get between 5 and 10 uses out of these depending on if I file down the nails that are too big. It makes them great value. I don't like the glue in them so I get the Elegant Touch Brush on Glue £3.10 (here) This last ages. The combination of these two products means I can have nice nails reasonably cheap. The brush on glue is much easier to apply and less messy. I find it lasts about 5 days too.


For my nails for this look I painted all my nails except my ring finger in Ciate Dangerous Affair (Ciate polishes can be picked up here for £9) I found two coats gave a gorgeous pinky red shade. It's lasted well without chipping.


For my ring finger I painted them using the Ciate Cutie Pie. It's a creamy nude pink. I left this to dry well before starting the nail art. Once dry I applied 3 oblong shapes to my ring finger in Dangerous Affair. Then left those to dry.

Once they were dry I used my handing dotting tool and Ciate Cupcake queen to make the oblongs round with two lines of cupcake queen. I then applied a dot in the middle of the smaller one's and swirls to the bigger ones.


To add the leaves I used the dotting tool again, this time using Avon Midnight Green (reviewed here). I adding two leaf shapes using my dotting tool.

I left it my nails to dry then painted with a coat of my trusty Seche Vite (reviewed here) I can't be without this top coat now.

Sorry they look a bit scratched. They are four days old now!

One last thing I'm loving at the moment is this Nail file and buffer from Avon (found here for £3). It has a great cuticle trimmer on the end which makes neatening cuticles so easy. I don't like the file much but the £3 is worth it just for the cuticle trimmer in my opinion. I get much better results then any liquid cuticle remover.


Have you done rose nail art? Would love to see your colour combinations!

Love M

xxx


SHARE:

Sunday 10 February 2013

NOTD: Valentine's Day

With Valentine's day on Thursday we thought we'd post some ideas for cute nail art. Any excuse for us to play around with our nail polishes collections as we are both huge nail polish addicts.

L had picked up a cute Nicole by OPI polish called Have a Heart which is just perfect for Valentine's nail. It's a pretty fine clear glitter that has pink foil hearts suspended through it. 


Over the top of a Essie Lovie Dovie which is a gorgeous medium pink nail polish the hearts really stand out.


As with a chunky glitter and other polishes similar to this to achieve the even effect with the hearts it works best to more dab them on from the brush.


It gives a really cute effect and is perfect for Valentine's day! 
From looking online this polish now seems a rare one! It may be different in the US but if you want this ladies I could only find 3 bottles of it on eBay.

Lately I have been back to biting my nails. I'm so annoyed at myself but just can't seem to stop. Back to the bad tasty polish and stuff I think. Any tips let me know.

For now I tend to keep false nails on as much as possible as it means I can't bite them. I stuck some on Tuesday and was playing around with some designs. After those come off I have bit my nails so low I can't put false ones on at the moment so I only have my playing around ones to show you all.

Image from Get Nailed Facebook.
I had to share this with you. I've recently found this on Facebook. You can like her page here. She hand paints the most amazing nail art designs for reasonable prices and does amazing phone cases too. Once the spending ban is over I'm going to be ordering from her. If you're quick she has a competition to win these ones going on till tomorrow (Monday 11th)

Anyway when I saw these nails I was totally inspired. Especially by the heart tips. I love the simplicity of it.

I started off with a base coat of OPI I'm Not Really a Waitress. I got this in the best of the best collection a few years ago from my other half (who told me the other day he wanted to be referred to as A if I have to blog about him) I tossed this colour aside. It was one of those I didn't swatch and decided from the bottle I wouldn't like it. Something about it in the bottle made me think of a colour for my mum more. I mean a shimmery metallic darker red didn't scream put me on your nails.


I missed judged it. On the nails I love it. It comes out as such a gorgeous shade of red. Bad M judging nail polish on it's colour in the bottle. I was impressed with the quality. After one coat it was perfect but I went with two out of habit.


I tried to use my white Model's Own nail art pen to draw heart tips. Who knew that would be so hard. I didn't like the way it looked so I tried to cover it with glitter. I still didn't think it looked that good. I love the way it looks on Get Nailed's nails but on mine I couldn't get the shape right.


So I tried something different, a little simpler and it worked a lot better. I think this would look cute on just the thumb and ring finger. I used the Nail Art pen again. You could use a dotting tool or kirby grip just as easily. I used three dots to get the heart shape. Sometimes simple is best.

Something I may have to try for my nails though is this design from Polish You Pretty.


I really love how cute this looks.

Hope you like our ideas.

Love M

xxx


SHARE:

Tuesday 8 January 2013

NOTD Studded Nails

When I was picking a nail varnish on Saturday I wanted to do some nail art but I was feeling very uninspired after routing through my nail varnish. I chose to use one of the Ciate ones I had in my advent calendar as it was one I loved the colour of but hadnt used yet. It's called Cabaret. 


I love the wear of Ciate polishes. They are streaky after one coat but after two give a gorgeous finish and last really well. When looking for my top coat I spotted some studs I'd ordered from eBay. You can find similar ones here. I always get nail stuff from eBay and usually from China as it's so cheap. You just have to wait a while for delivery.


These particular studs are great as they have flat backs so I don't feel the need to pick them off. When I've done this before and use Caviar type beads they annoyed me quickly.  Caviar manicures annoy me after 24 hours and I tend to pick them off.

This manicure lasted me over 48 hours. In that time,  I cooked, cleaned, had a bath and spent a whole day in work. In that time only one stud fell off. That's pretty impressive to me. The only thing was some of the studs ended up looking more silver than gold as the colour wore off.


To do this manicure.  I painted two coats of nail varnish. Then used my Seche Vite and applied it one nail at a time. I sprinkled the studs onto a DVD case and touched them gently with my dotting tool till they were all the right way up. 


Using a not very hygienic method (but it's my nails and easiest so doesn't matter) I lightly dabbed the end of my dotting tool on my tongue then found it was easier to get a stud on the end. I've tried other methods and they don't work as well. If you don't have a dotting tool you could get one cheap on eBay when you order studs or use a toothpick, tweezers or something similar.  When a stud was on my dotting tool I gently pressed this into the wet top coat and continued to apply them.  Once one nail was done I applied top coat to the next nail and repeated.  When they were all done I added a layer or top coat over the top.


I'm so impressed with how long this manicure lasted and how quick it was to do. Which surprised me. I'll be doing this more as I love the way it looks. Im gutted I lost a nail on the way home so I've had to take a them off but all studs were still strong, none were loose and I think I'd have got another couple of days out of it.
Do you like stud manicures?
Love M
Xxx
SHARE:
© The CSI Girls. All rights reserved.
Blogger Designs by pipdig