Wednesday 25 June 2014

My Everyday Make up Routine FOTD using Naked 3

Hey All

As you read this L and I will hopefully have arrived at Glastonbury and be in the queue. We will stop speaking about it soon but we are just sooooo excited to go to our first festival!

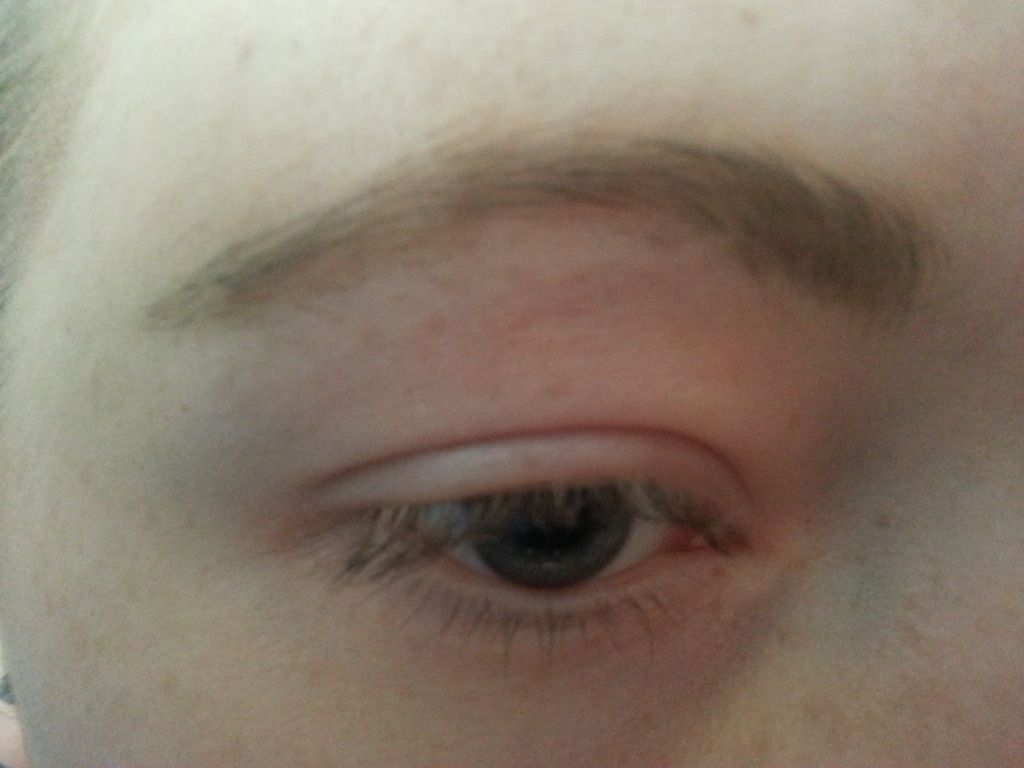
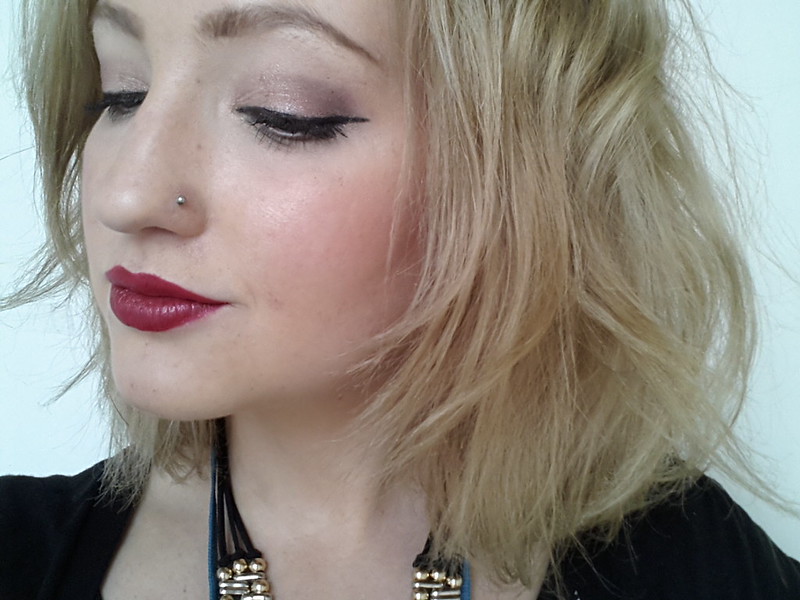
Today I wanted to share with you my everyday go to make up look. This is one I do if I have enough time to tackle the dreaded cat eye in the morning. I tend to go for the liner if I'm meeting someone or doing something after work. Please ignore my brows they were being grown out pre wax!

Since I got naked 3 I use it almost everyday. I wasn't sure about the pinky tones to it at first but I really love the way they look on my skin tone and think they'd suit many tones. They also have some amazing matte neutrals that are so easy to use everyday.

Untitled

Untitled

Untitled

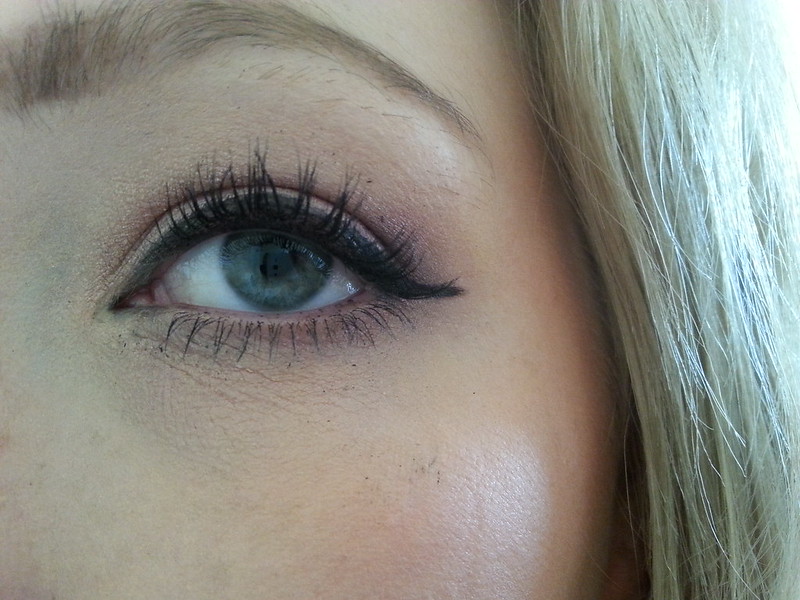
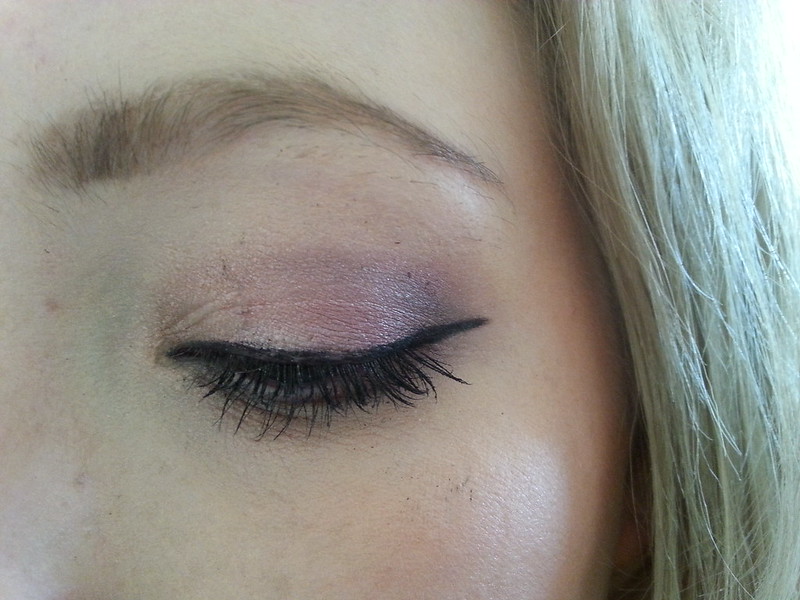
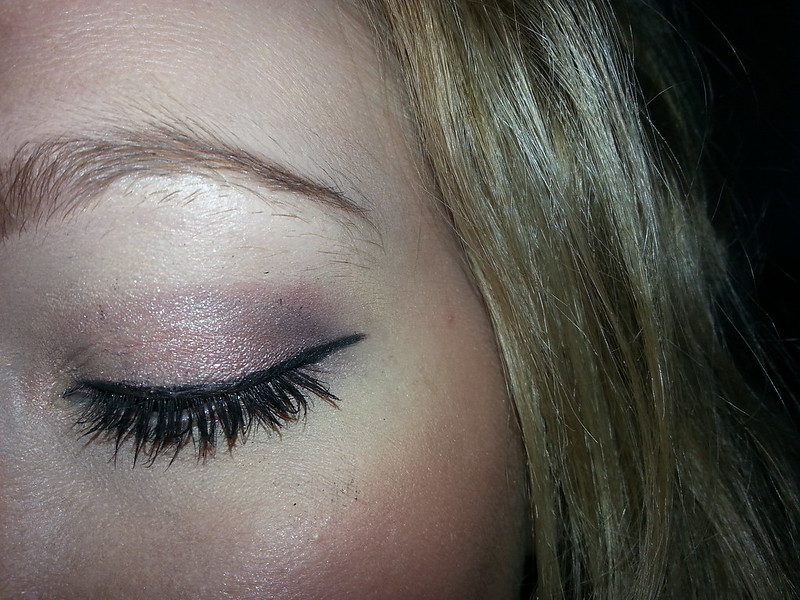
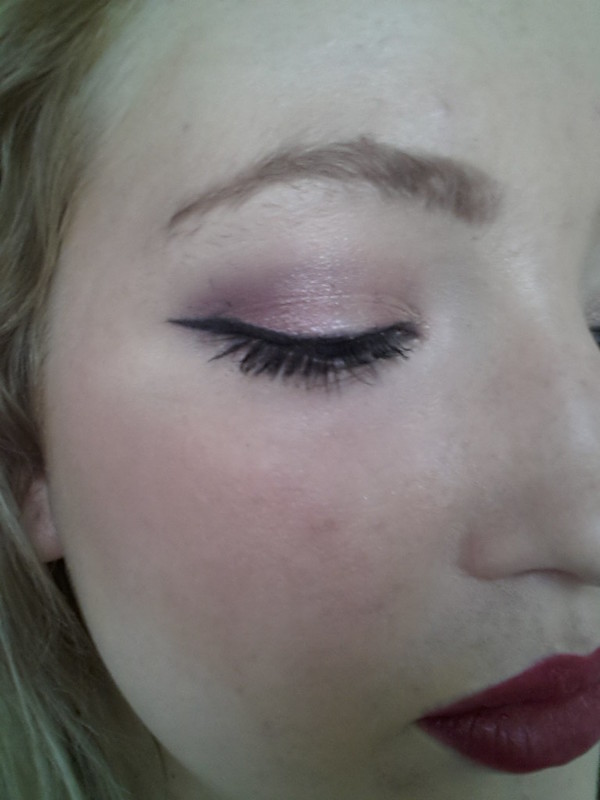
I tend to go with a matte crease colour then shimmer colours over the lid and deeper colour through my outer v. For this look I used limit and nooner mixed and blended out through the crease with a bit of dust and liar on the lid and the used factory and blackheart and add some darkness to the corner.

Untitled

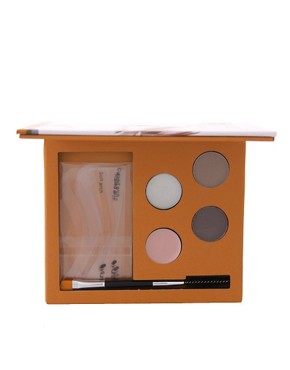
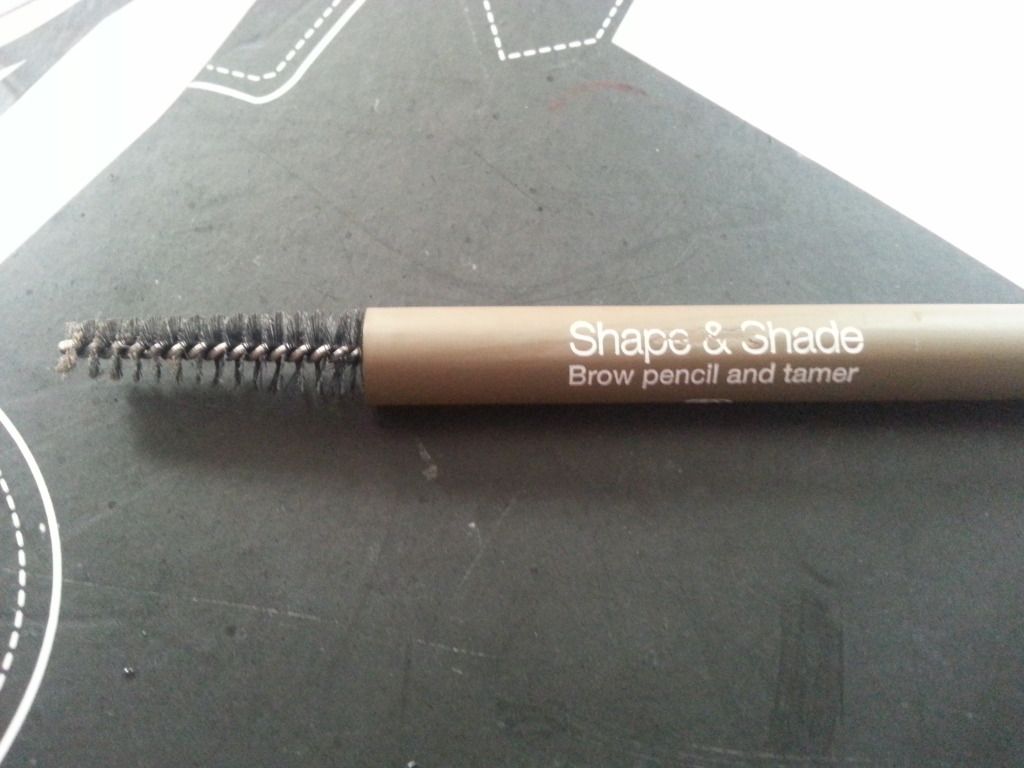
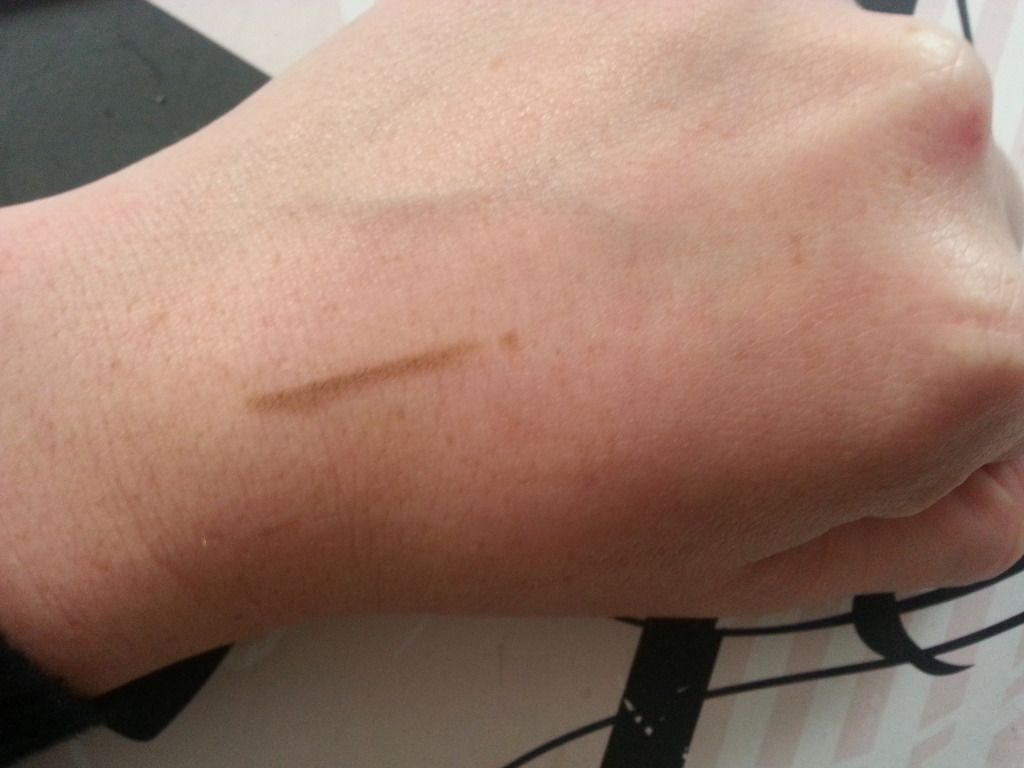
As always for me the gel liner is maybeline. I'm on my third little pot of it. I just can't find another to compare. For mascara it's my ever faithful maybeline colossal volume. Another old faithful! And on the brows is my eylure brow pencil. 

Untitled

For skin I'm loving using Illamasqua skin base. It gives such a light flawless finish and lasts all day.     

Untitled

The cheek combination is one I've not been able to find a better mix of. My Liz Earle healthy glow bronzer and Benefit dandelion blush. For highlighter I'm loving the one from the naked flushed palette as it's a bit better for day time than Mac MSF as it's less sparkly.                

Untitled

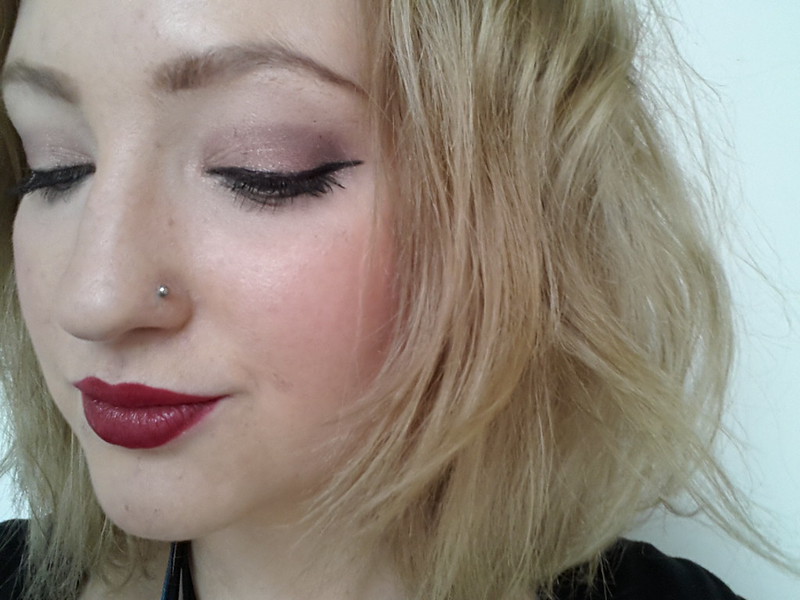
For concealer I'm still loving my Nars Radient Creamy Concealer. It offers amazing coverage, lasts all day and my little tube is still going since before Christmas. I think it's running low now but seen as it gets used a lot I'm impressed it's last so long.

Untitled

On the lips is Mac Brick o la. This is one of my favourite all time lipsticks. It's an amazing soft red and not so in your face if you don't want to wear a bright red to work (personally I love bright reds but I know some people find them OTT for work!). It is an amplifed formula so lasts really well and is opaque in one coat.

What are your everyday favourites? Do you get stuck in a make up rut? I'm definitely in one at the moment! I think I need to take my naked palettes off myself for a bit!

Love M

xxx


SHARE:

Monday 27 January 2014

Get Ready WIth Me - Night Out

Hey All

Hope you had a good weekend. I've had a really busy week last week and the weekend was rather busy too. I went out on Friday night and thought I'd do a type of get ready with me post. I love watching these on YouTube and love FOTDs that show you the look step by step so it's easily re-creatable. The lighting and photos aren't great as it was night time!

Untitled

After showing and washing my hair these are my current go to products! I have to use a lip scrub and I couldn't be without my breath of fresh air toner. As I've got a few big spots at the moment I use my Effaclar Duo before my moisturiser. As It was for a night out I used the Label.M volume foam to add some extra volume to my hair.

Untitled

I was soooo impressed with the volume the label.m foam gave and it didn't make it sticky either or feel caked in product! Hello night out must have!

Untitled

Untitled

For a flawless night out for me there are four products I have to use! Benefit Porefessional, Illamasqua Skin Base applied with a beauty blender type sponge and Nars Creamy Concealor. They all just make my skin flawless. Illamasqua skin base was definitely a foundation I fell in love with only after using a beauty blender type sponge. It was all I found worked for me application wise! I then set all my base using my HD brows powder!! I'm really loving this for oil control and setting make up.

Untitled

At the moment I'm totally in love with the make believe bronzer. It's a perfect matte shade and comes with the softest brush. I contour my cheek bones, nose and around my forehead and temples.

Untitled

As I was going out it had to be Benefit Dandelion blush. No matter how much I wear other blushes none are as beautiful as this. I love the soft pink. I then used Mac MSF in soft and gentle. It really adds a shimmer to the cheeks.

Untitled

To primer my eyes I blended constructivist Mac paint pot all over the lids up to the crease using a real techniques crease brush.

Untitled

I then applied Mac naked lunch (a soft nude shimmer) all over the top of constructivist to set it.

Untitled

To the crease I blended out a mid brown matte shade. This one is from a Lancome palette I have but is similar to UD tease in the naked 2 palette.

Untitled

Untitled

As it's been a while since I wore it I blended Mac Cranberry through the crease and under the eye. To smoke it out and to softer the redness I blended a matte black shade through the outer v and half way across the under eye.


Untitled

For me it's all about the Eylure 116. They are one of my favourite lashes as they are subtle and just lenghten. I applied these and lashings of Maybelline Colossal Volume.

Untitled

For my brows I used my Benefit browzings. I use a combination of the wax and powder and set with a Collection clear mascara. I think used my Laura Mercier Secret Concealer to line around my brows to highlight the brow bone and sharpen the brow line.

Untitled

I then lined the eyes using my Maybelline gel liner in black and a real techniques liner blush. As I didn't want my eyes to be too black I used Rimmel Scandaleyes liner in nude to line my waterline.

Untitled

For my hair I straightened it and add slight shape to the front by turn the straighteners. I hate it when my hair just sits flat.

Untitled

Untitled

For the lips I went with Mac Fanfare. It's such an easy to wear colour and looks soft and subtle on the lips without looking OTT when wearing a bolder eye.

Untitled

Finally for my outfit I wore nude sparkly shorts bought in the New Look sale last year, New Look black vest with lace detail, New Look blazer, Primark fleece lined tights (I'm getting so old I wear tights on nights out!) and finished the look off with my Primark boots, Ollie and Nic clutch purse and my sphere of life heart necklace!


Hope you all had a great weekend! Do you mind photo heavy posts?

Love M

xxx


SHARE:

Tuesday 23 April 2013

Tutorial: Eylure Individual Lashes

A few weeks back I picked up the Eylure Individual lashes. After seeing a few tutorials on them I thought I'd give it a go myself. I love the look of false lashes and regularly wear them for nights out. For everyday wear I can't be bothered though.

2013-03-22 21.12.24

I got mine from Boots for £5.35. Next time I'd get the just short and medium ones as I found the long ones too long. The ones I got are cluster lashes. I'm tempted to try the single ones next.

2013-03-22 21.13.01

The lashes are semi permanent. They come with full instructions, 3 different lash lengths, eyelash glue, and remover.

2013-03-22 21.12.54

You'll also need a pair of tweezers, tin foil.


2013-03-22 21.13.31

To start the lashes need to me clean and oil free. To do this I used my Liz Earle Cleanse and Polish and a bit of toner.

2013-03-22 21.13.49

Once I'd cleaned my eye lashes I sat down at the table, I'd recommend sitting somewhere where you're able to rest your elbow to steady yourself. Also do it when you've got lots of time if it's your first time.


2013-03-22 21.27.54

To apply the glue to the lashes it is recommend to put a drop of the glue onto the tin foil. Only put a drop on as it dries out and this prevents wasting too much of the glue. This glue is stronger than normal eyelash glue. Using tweezers pull of the size of the lash you want. (It's recommended to start with long on the outside and work into small on the inner eye)


2013-03-22 21.30.32

I found it easiest to use one hand to hold my eye shut and the other hand holding the tweezers, holding the lash with the blob of glue on the bottom. Unlike usual lash glue you can apply this straight away, you don't need to wait for it to dry. Apply as close to the lash line as possible and make sure the curl of the lash is the right way up. I found this the trickiest bit and you'll see some of my lashes aren't at the right angles.


2013-03-22 21.30.53

This would be so much easier to do on someone else. I did think it was easier than I expected thought. I found some lashes after I'd place them would come off as I applied the next but I learnt to be more careful as I went on.

2013-03-22 21.39.33

The lashes blend so well with my natural ones, even though my natural lashes aren't that dark. I needed to apply more to the edges than I did here. It is recommended to apply between 7 to 14 clusters depending on taste.

2013-03-22 21.40.41

Here you can see the outer cluster is slightly wonky. 


So how did they last. I applied them on Friday evening and they lasted through too Tuesday morning. I had lost some by this point and they had started to annoy me. Overall I think they'd be great for weekends apply and special occasions.

PhotoGrid_1363988665506

I'll definitely be repurchasing but like I said above only in the short and medium lengths.

Have you tried the semi permanent or individual lashes on yourself?

Would you?

Love M

xxx


SHARE:

Tuesday 26 March 2013

Spending Ban Update 9

The spending ban is very nearing the end, it's completely changed me. Even though I want things I have developed some will power (ignore last week's post where will power disappeared for a brief moment haha). I've stopped buying make up it seems. I'm so proud of this. I am now keeping my empties and I don't seem to be using much of it. I think even when the ban ends I really need to resist buying any more foundation, primer or mascara for a while. A girl always needs more lipstick though right.

First things first I did break the ban twice this week. One thing was absolutely necessary. It was this black dress from Asos. Unfortunately my mum's auntie passed away last week so I needed something long and plain suitable for a funeral. It was only £16.50 and it will be great for work after.


Secondly I went bridesmaid shopping with one of my friends for her wedding. I had decided I wanted to look my best while shopping and decided to do my make up how I may wear it on the wedding day. This involved individual lashes which I didn't own. As in Boots it's 3 for 2 at the moment it seemed silly to just buy the lashes. So I also picked up a Revlon Nail Varnish and the False nails I always use. (shown in this post).

20130322_211225

20130321_181558

The nail varnish is so gorgeous!! I love all the colours in it.

I will be adding on a few extra weeks to make up for my breaks. I'm thinking maybe I'll go till July. We will see.

How are your bans going?

Love M

xxx

SHARE:

Wednesday 7 November 2012

Eylure Shape and Shade

After seeing a photo @n (you can find her blog here) posted on twitter I instantly noticed her perfectly groomed eyebrows and had to ask her what she used. Eyebrows is something both L and I notice on people and I think a well groomed brow really finishes a make up look and frames a face. I have very fair brows due to being blonde and if I don't use any product on them they are easily hidden.


My two favourite before discovering this pencil were the New CID i-groom pencil which costs £15.50, found here. This comes in one colour which is meant to suit everyone. It works really well on my faint eyebrows! It comes with a groomer on the end and both have lids to keep them clean.

Image from New CID website


The second brow product is the Eylure Brow Palette. This is a set with two brow shades a highlighter and a wax, aswell as stencils. I'm not someone who has got into using a wax yet. I just can't get into the habit and only one of these shades suit my brows. This retails at £10 and can be found here. While I like the powder it wasn't my perfect brown product as I found I only used one thing in the set. The brush was ok but got dirty quick.


Image from ASOS


Onto my new eyebrow love. The Eylure Shape and Shape. I use this in Shade 3 for Medium to Light blonde. This is £5.39 from Boots and is currently on buy one get one half price.


It's a simple packaging with the colour of the product the colour of the packaging. It comes with a cover for the pencil but not the groomer which I would prefer it did.


It comes in three different shades and is described as being good to fill in sparse brows. I agree with this. It really fills in the bald patches in my brows. I always seem to have a slight bald patch annoyingly, and this fixes it.


The pencil itself is quite hard but I like this. It's easy to do lots of little strokes to build up brows so they look natural. I find some pencils that are softer hard to build up a natural look as you get large strokes.


The brush part is pretty standard. It does the job well. I like to brush my brows down after I've applied the pencil as I find it gives the best result and blends the pencil into the brows further.


As you can see here it's quite a natural blonde shade. For anyone one with lighter hair that doesn't like to dark of a colour and just to enhance there natural brow to shape the face this is perfect.


Please ignore my unplucked brows and slightly swollen make up free eye I was sporting a very unpretty eye infection that meant no make up. I still did my brows to give my face a little something. As you can see it just gives a nice natural effect.

This is my new favourite eyebrow product. Thanks for the recommendation Lydia. 


I have such brow envy! and make up envy in general of Lydia! Doesn't she look flawless!

I really want to try the New CID i-fix next in my quest for the perfect brow. Have you used any of the products mentioned? What's your brow go to product?

Love M

xxx


SHARE:
© The CSI Girls. All rights reserved.
Blogger Designs by pipdig