Wednesday 12 November 2014

Urban Decay Smoked Palette


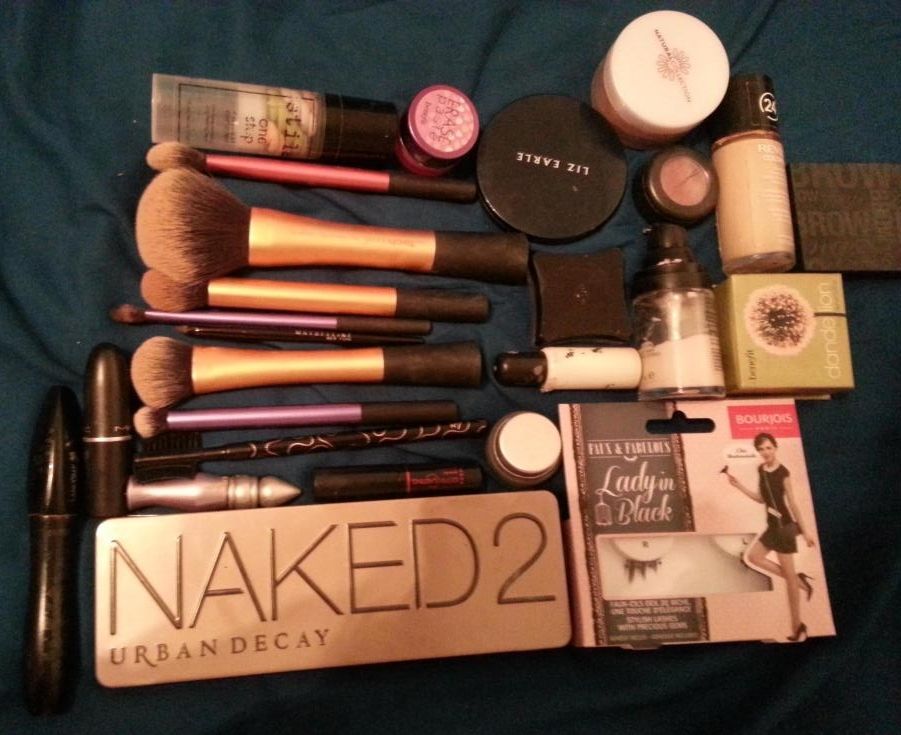
So as palettes go....I think most would agree that Urban Decay take the crown with them.

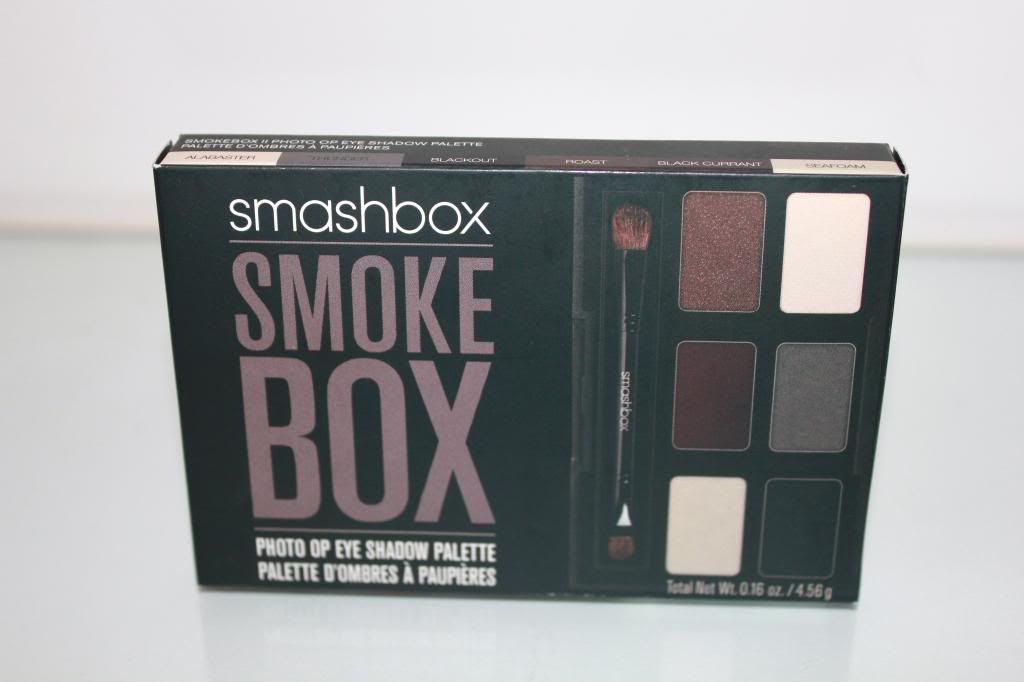
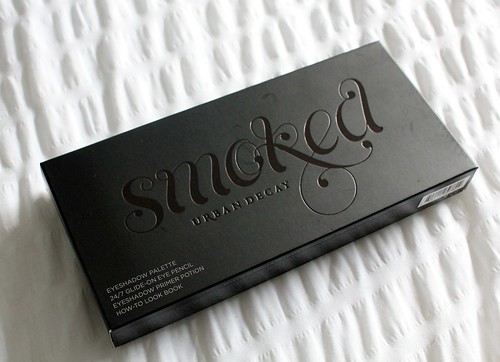
Having bought my fair share (is it 8 now? eek!) I can't believe that I didn't own this one; the Smoked palette.

001


003

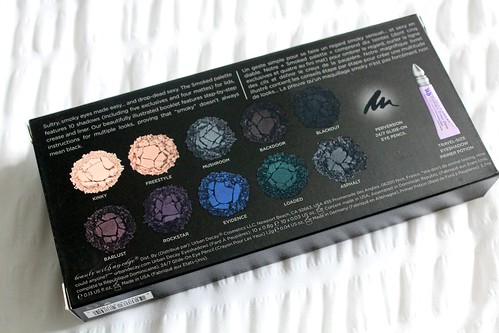
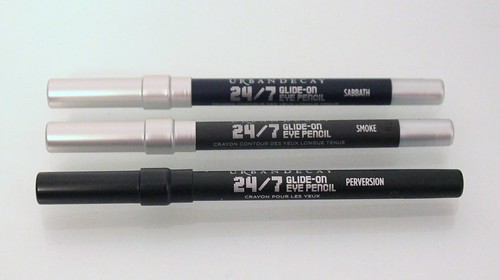
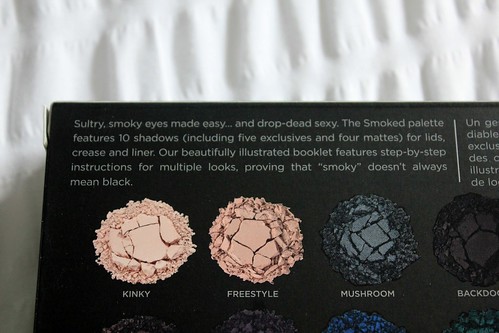
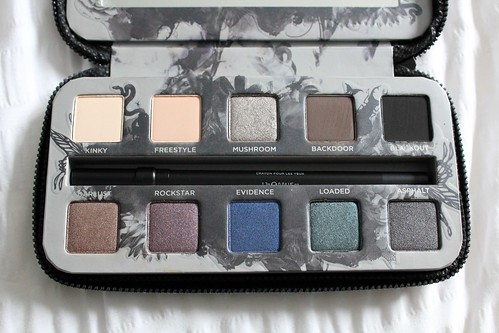
These colours are the colours I have been using for years all from random brands and not in a cohesive palette like this; it's amazing. There's the greys, the blue, the green, the purple, the browns and the super matte black. Not to mention the awesome primer potion and Perversion eye pencil that I might be a bit of a fan of.

004

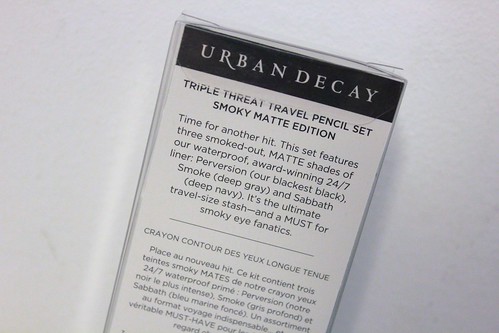
The blurb on the back of the box pretty much says it all, and it comes with a booklet to help you get the most out of the palette including tips for blending and looks to try.

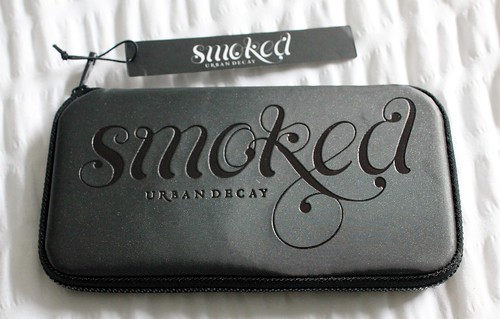
The packaging for this is different to other palettes, it has a zip all around it to contain the products inside and the material packaging looks really good. The only downside is that it may not be as robust as plastic palettes as it is only material over a cardboard exterior.

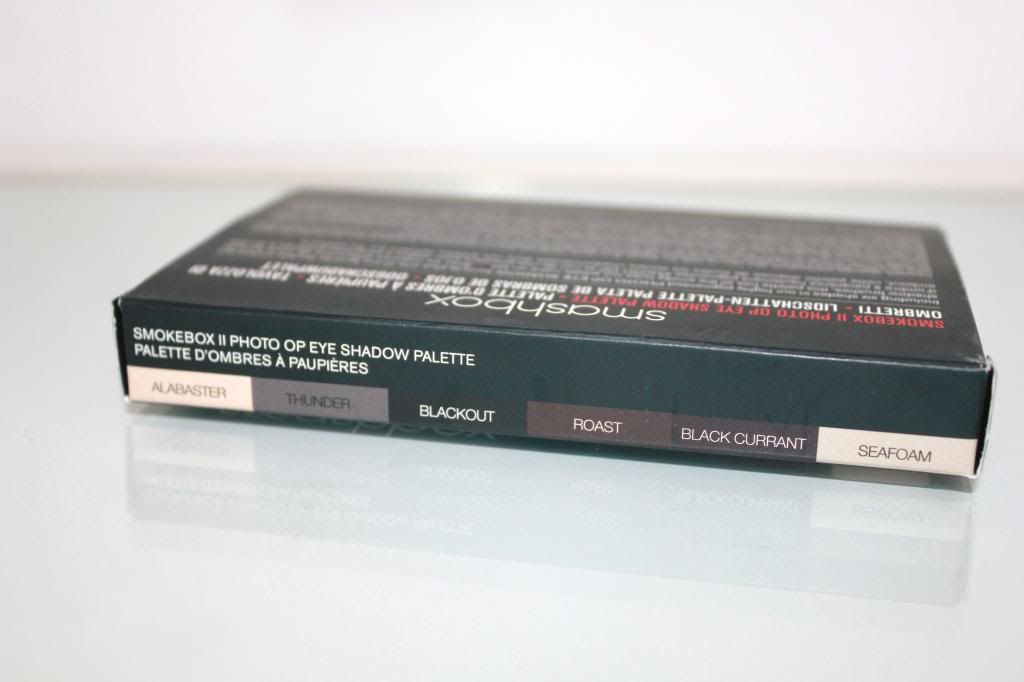
This where you can tell it was produced in 2012, they seem to have come a long way in their designs and packaging in the last few years.

007

023

009

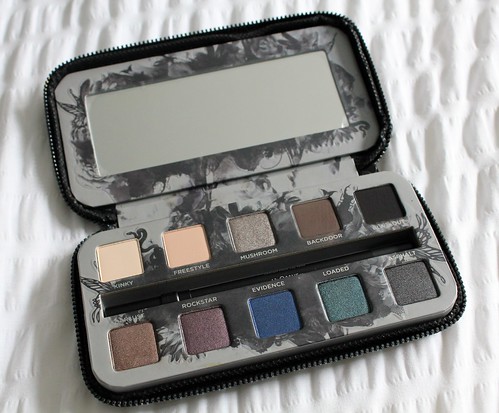
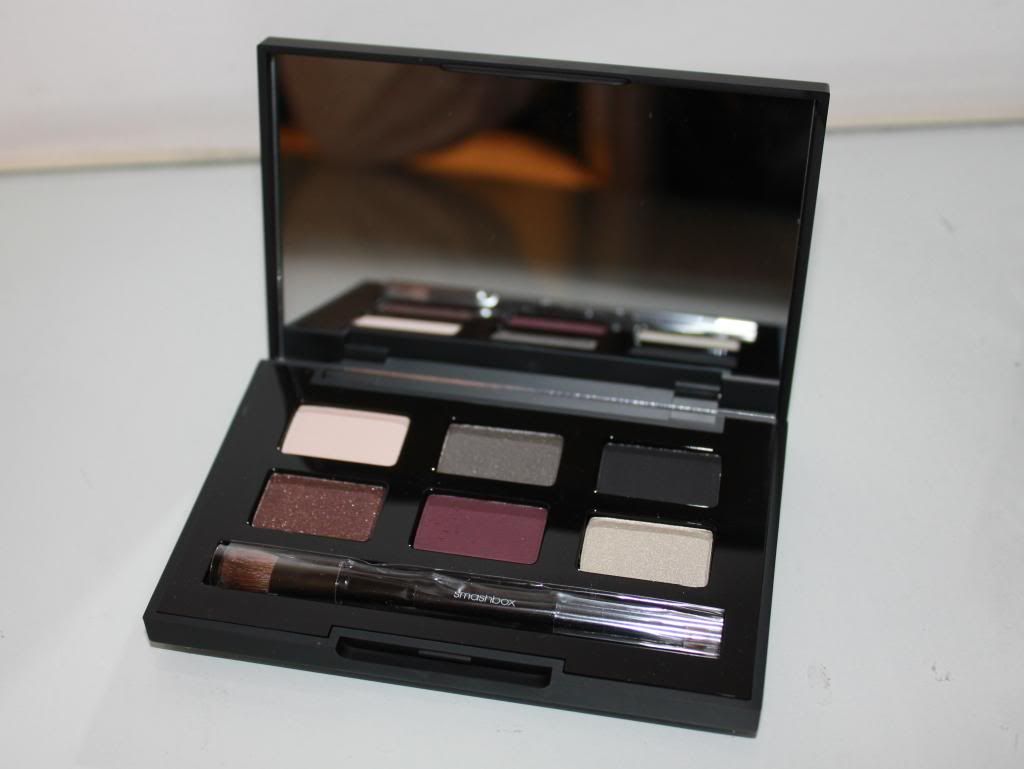
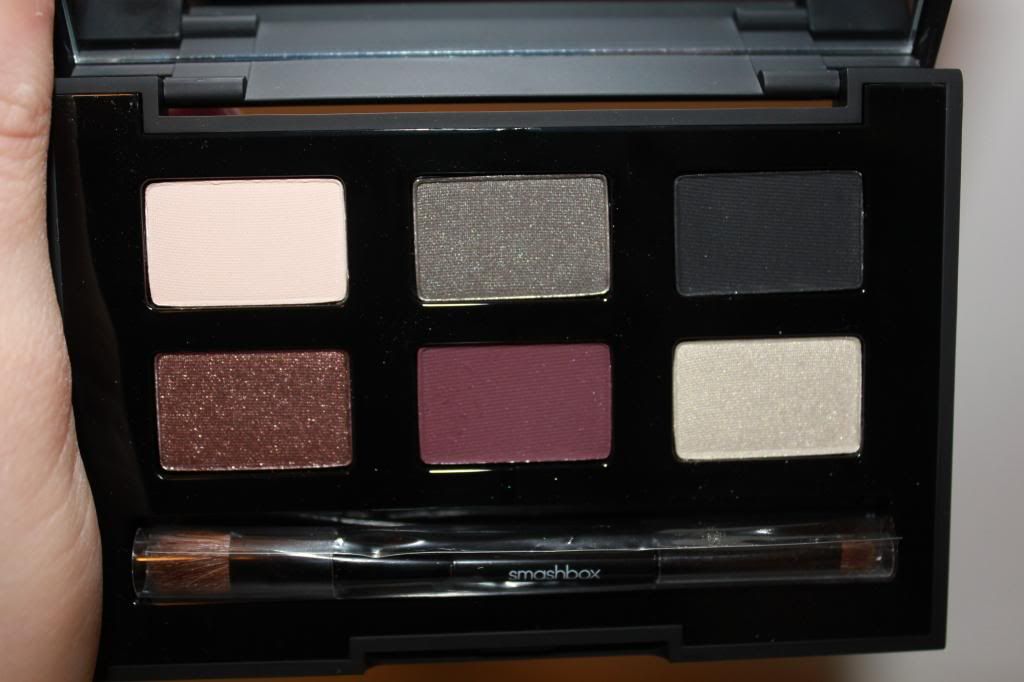
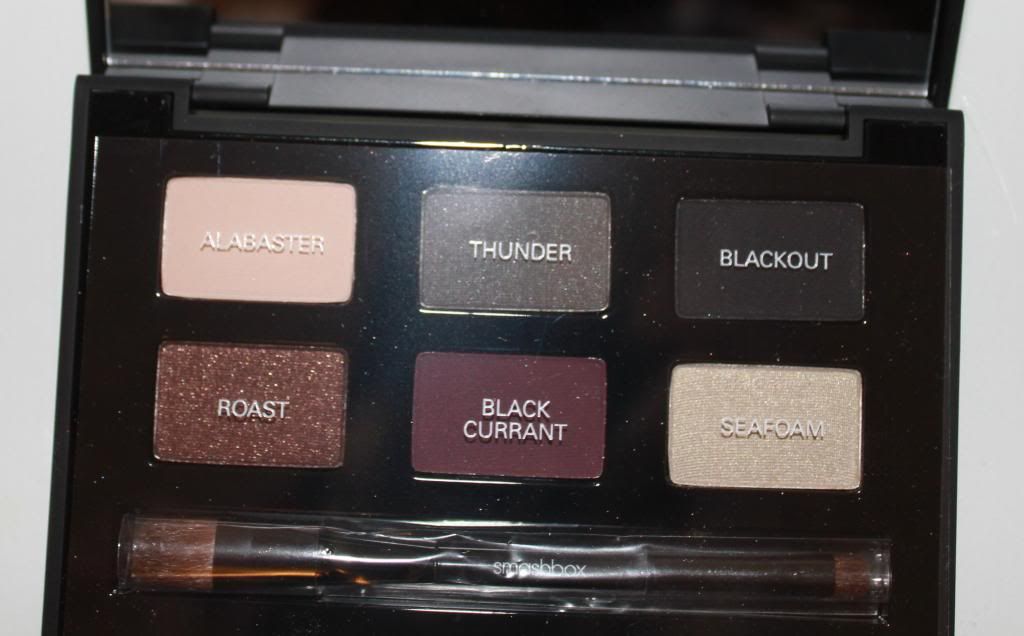
So how about the inside of the palette? The ten eyeshadows are arranged in square shapes with the eye pencil in between the rows. It also comes with a mirror which is very handy for on the go or just generally really! I've been using it loads when doing my make up in my room even though I have multiple mirrors to use.

011

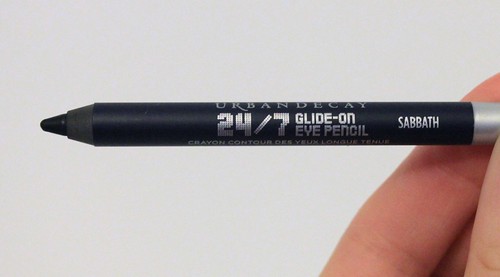
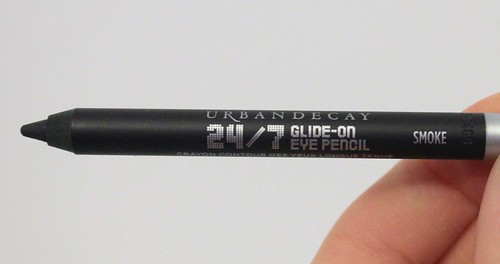
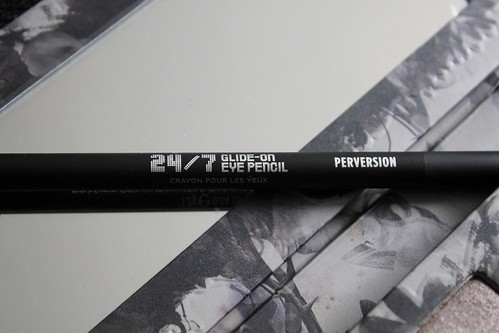
I have previously written a post on the Perversion 24/7 Eye Pencil which you can read here, so I won't ramble on about it too much but it is the PERFECT pencil for this palette and if you ever buy any eye liner pencil you most definitely need this one.

013

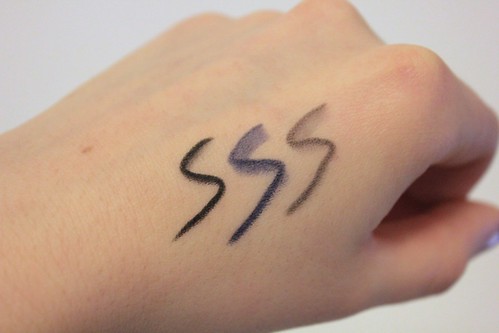
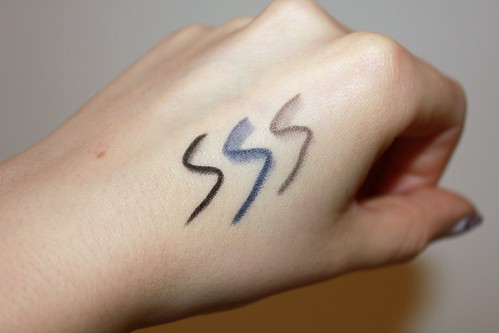
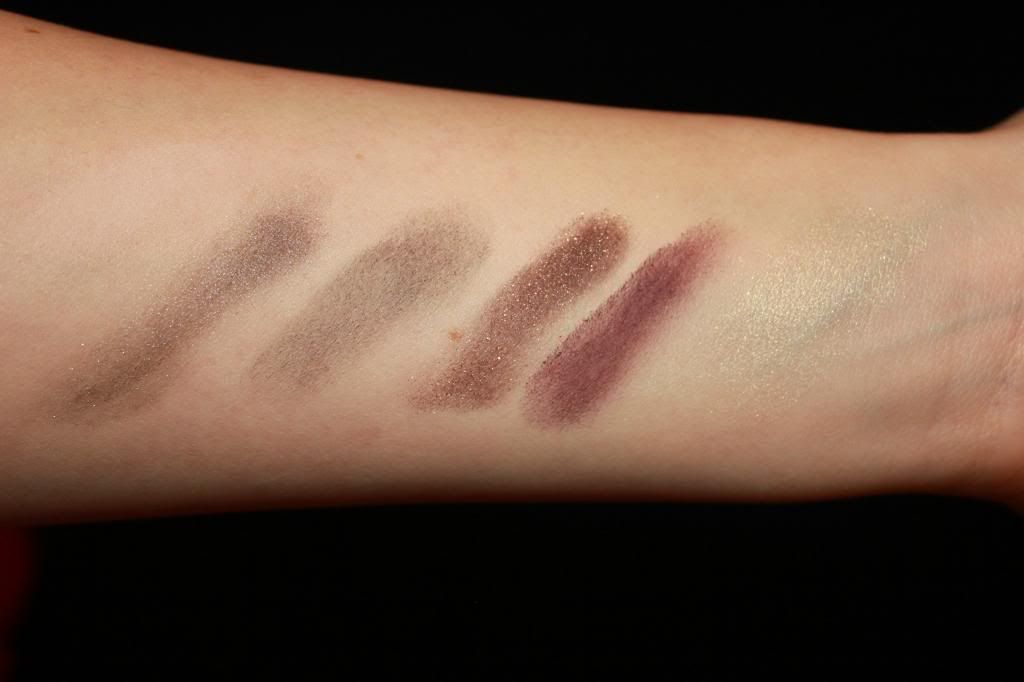
So what do the colours come out like? The photos show swatches of the eye shadows in the same order as the rows in the palette, without and then with flash.

018

020

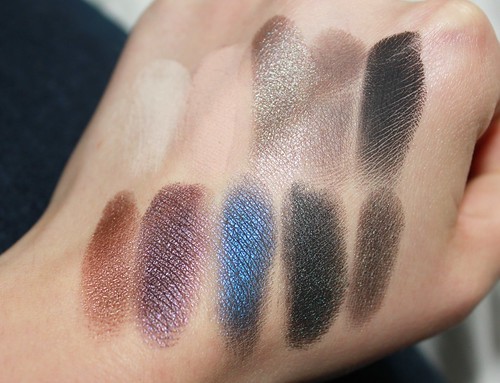
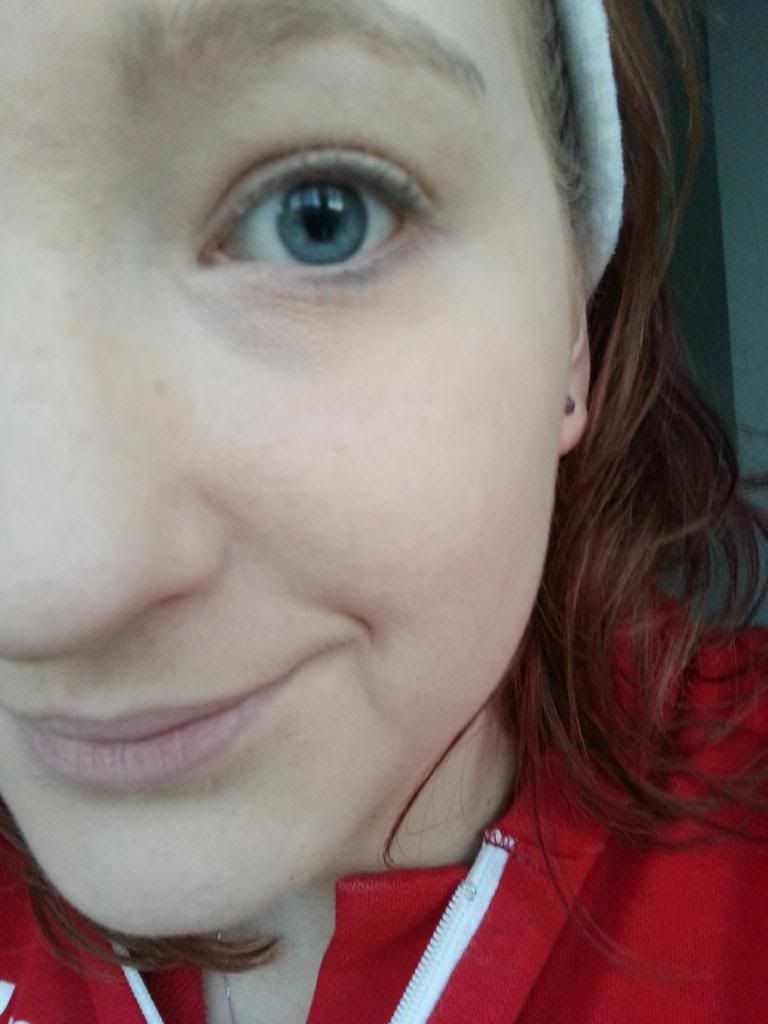
How beautiful are the colours?! I couldn't resist but have a play around with them!

036

039

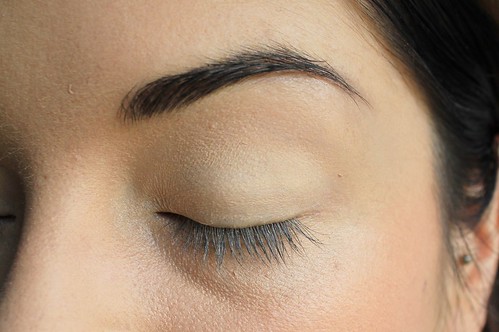
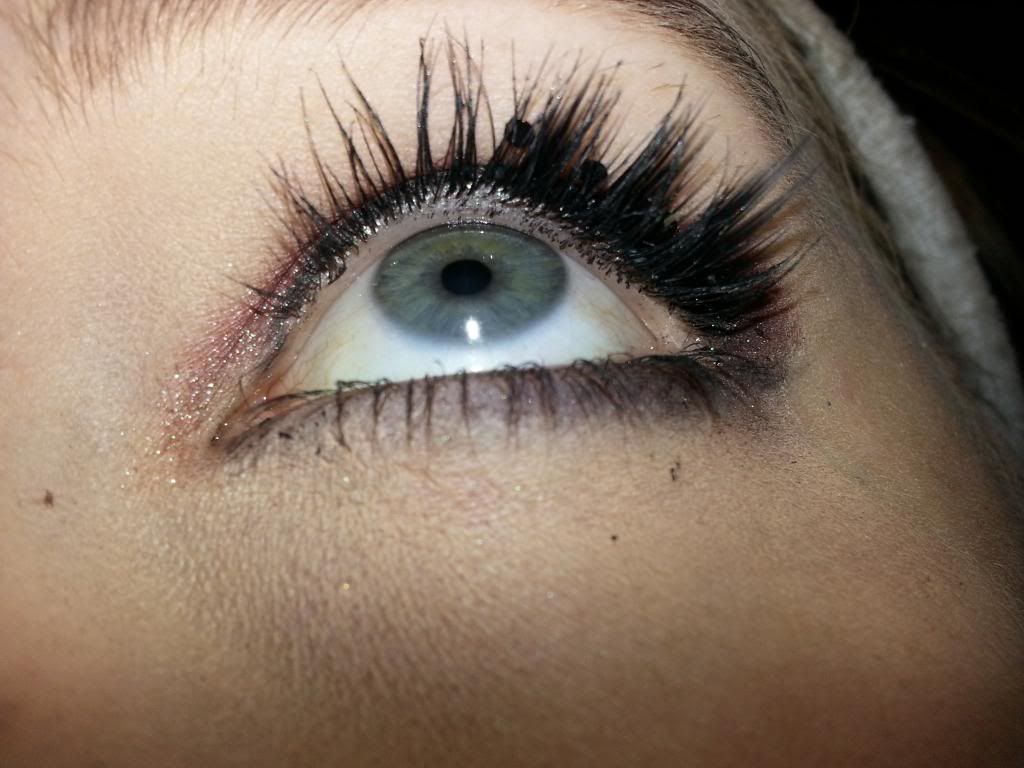
Both of the nudes barely show up on my skin but they are both good bases for a make up application. In fact I think I like them more for blending in so perfectly as they're so easy to use.

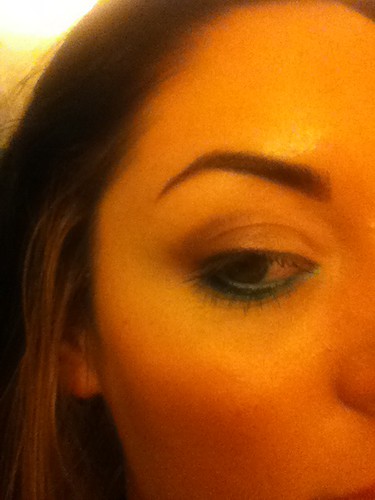
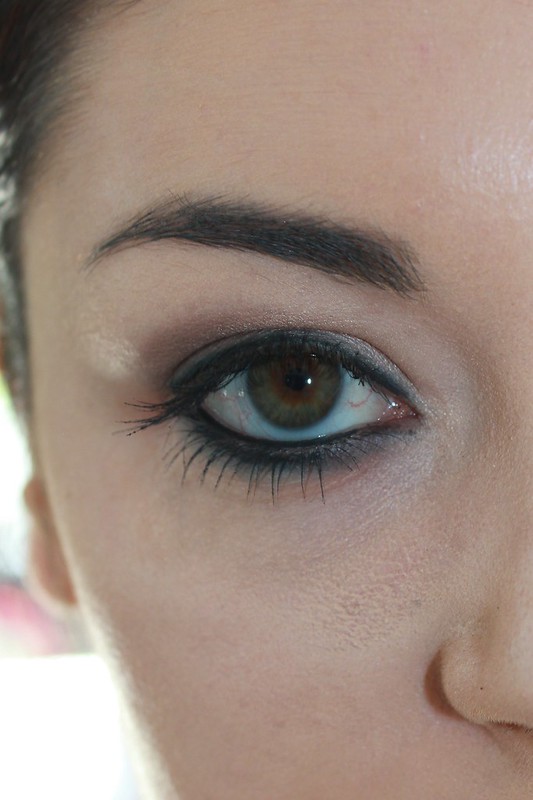
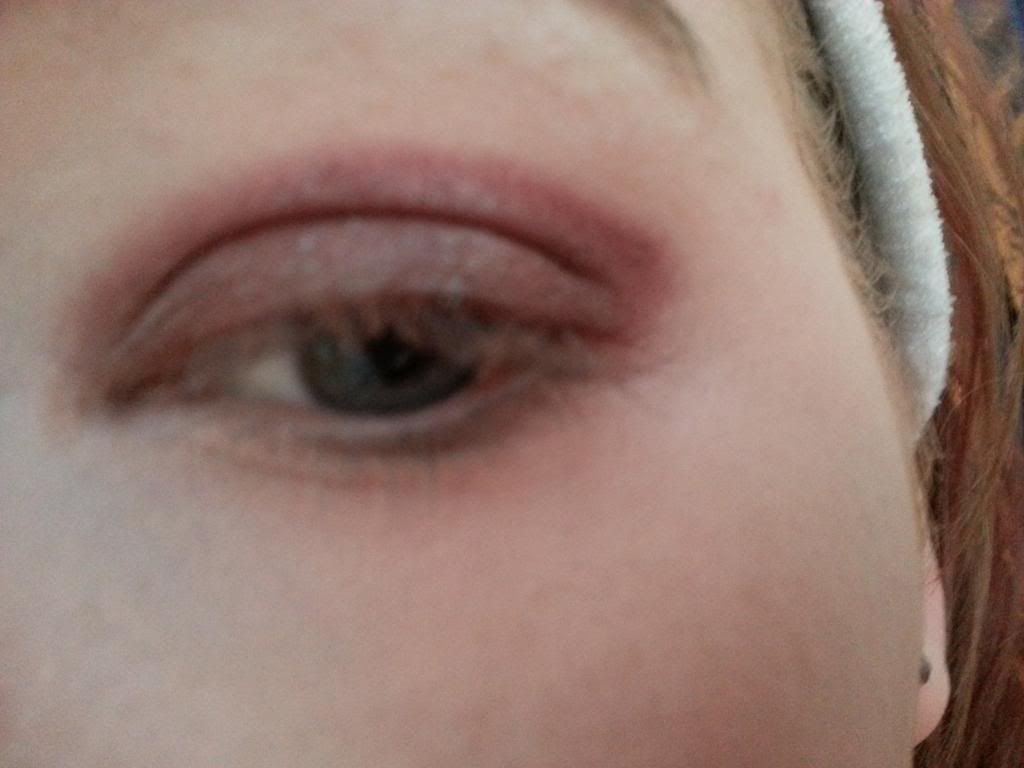
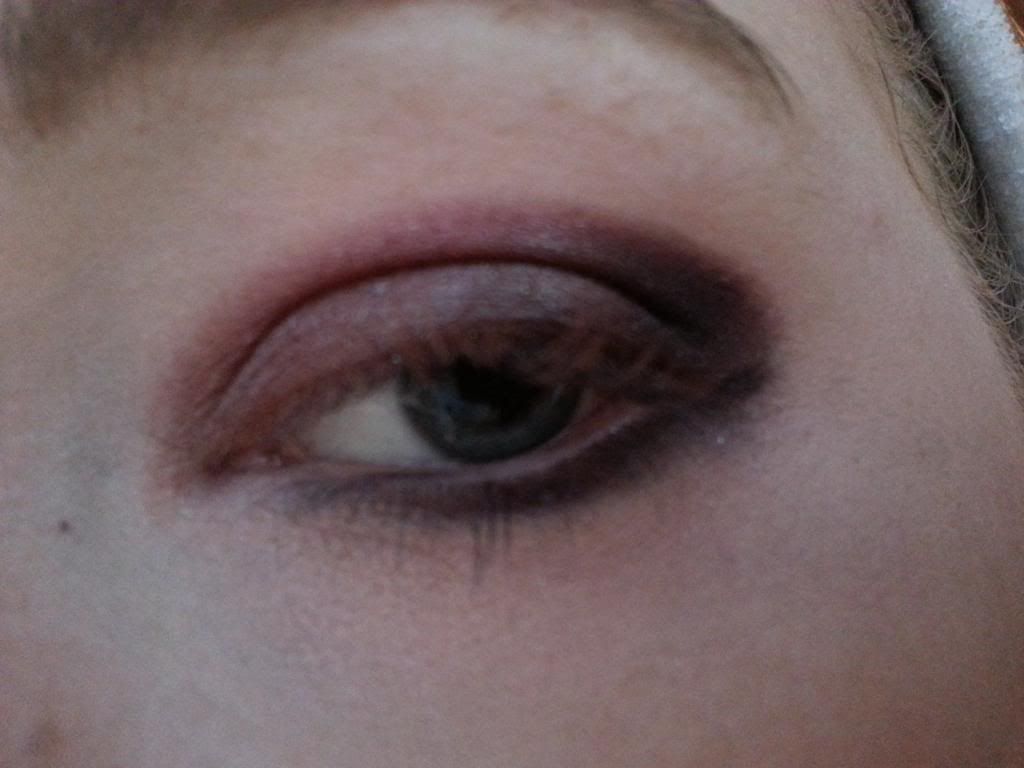
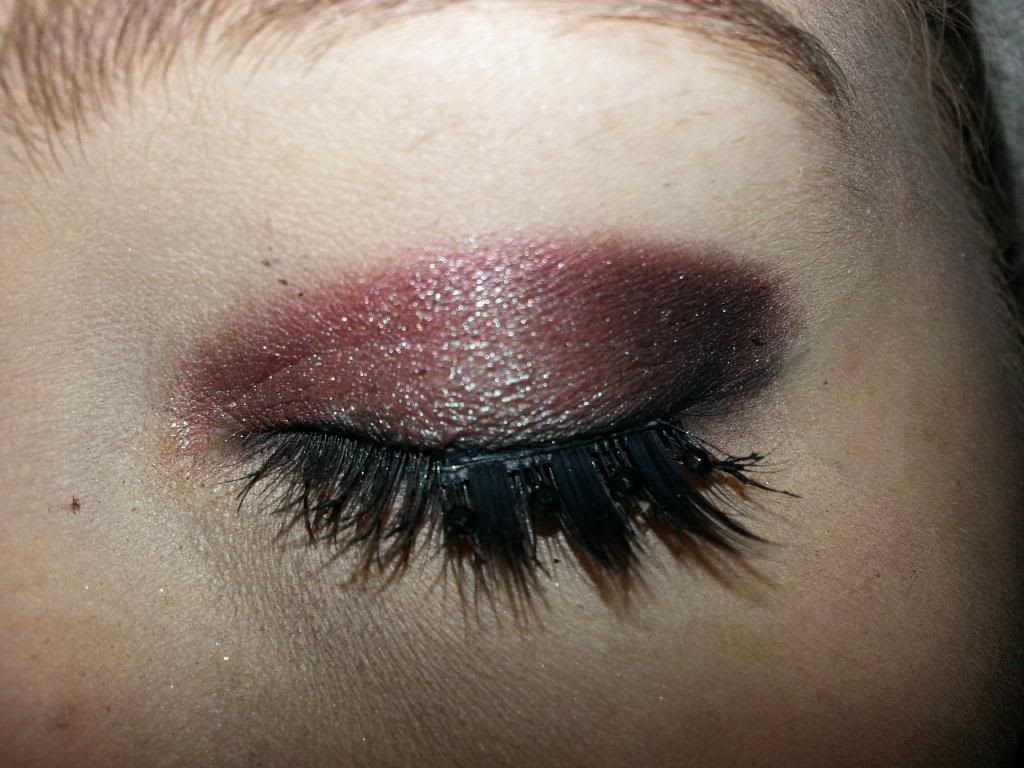
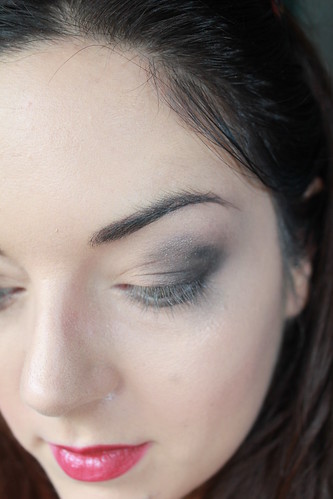
Below I've applied Mushroom to the outer corners of my eyes and blended it through. I really like this look and have worn it to work. I've also worn the same look with Backdoor also blended in to darken and mattify the outer corner shown in the second picture:

086

077


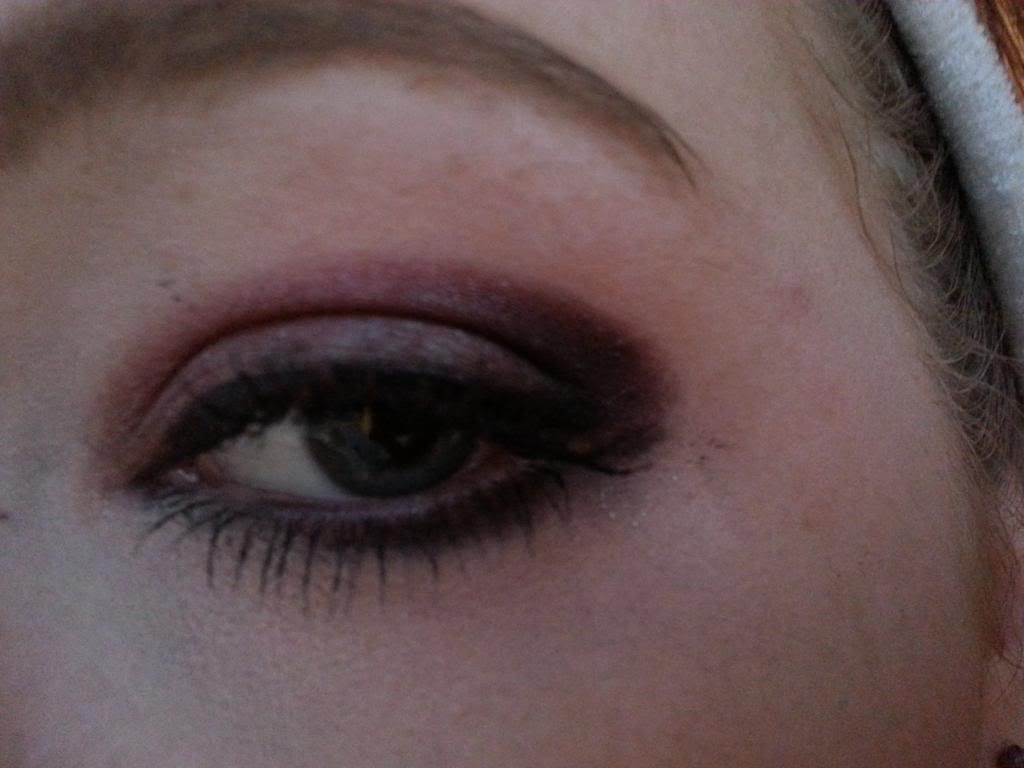
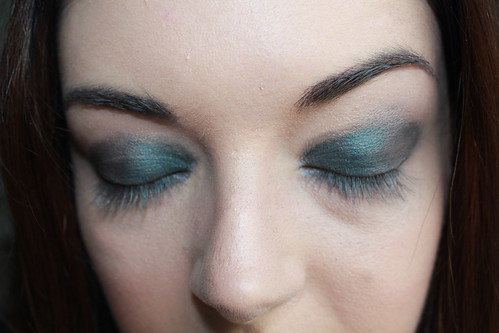
One of the main reasons I wanted this palette so badly was the ability to produce a variety of smoky eye looks which didn't revolve around the obvious black and grey. Green is one of my favourite colours for eyeshadow so Loaded was a colour I was keen to use:

096

138

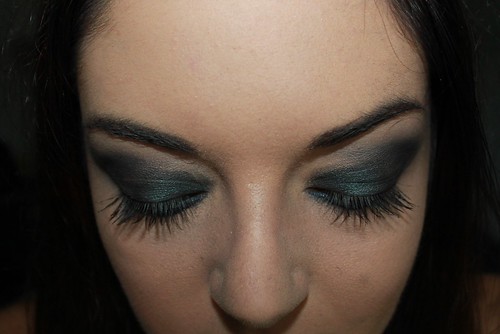
I absolutely LOVE it and have been having so much fun with different looks.

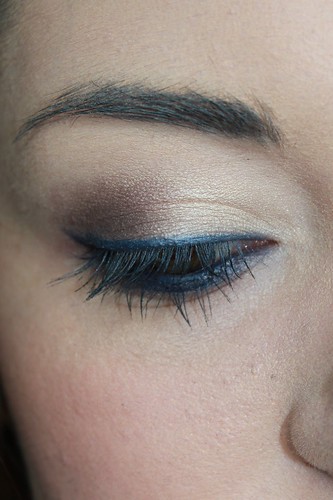
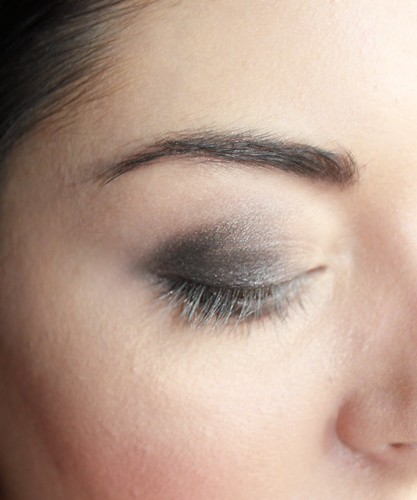
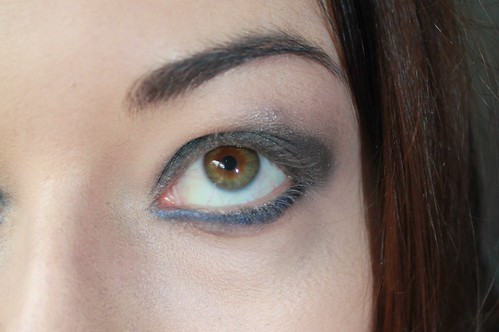
Evidence is also a gorgeous blue colour with so much pigmentation, I applied it under my eyes for a colour contrast using silvery greys Mushroom and Asphalt on my eye lid for a separate look:

101


136

Do you love creating smoky eyes? Have you used the Smoked palette before? What's your favourite colour to smoke out?

I'm looking forward to using this over the party season!


L xxx


SHARE:

Thursday 29 May 2014

Urban Decay Triple Threat Travel Pencil Set-Smokey Matte Edition


Good morning!

Being the Urban Decay obsessive that I am, as soon as I wandered past our local counter and noticed this beautiful set I couldn't help myself but snap it up.
This travel pencil set was an absolutely bargainous £10. TEN POUNDS!!! For only three of the marvellous 24/7 Glide On Eye Pencils?? I had to investigate.

018

020

As mentioned in the picture above, this colours are three of the matte smoked out shades of their award winning liners.

Perversion is their blackest black and I have heard so many great things about this that it was definitely the main reason for picking up the travel pencil set.
Sabbath is a deep navy and one I will look forward to trying out, navy liner is very popular with some but I've never tried it.
Smoke is a deep grey and will be perfect for day wear; I've been told this goes very well with the Naked 3 palette.


024


I especially couldn't help but pick this up after the lovely Haddie on the UD counter in Debenhams tried out some of their gorgeous pencils on me. She used three separate colours; freak, LSD and junkie to create an amazing flash of greeny blue under my eyes and i just fell in love with how beautiful and creamy they were and how they can so easily change your look.

Untitled


Aaaaaaaaaanyway back to the set. This is perversion:

025

It's a blacker than black absolutely essential pencil that every person needs in their lives, let alone an addict like myself. I should have picked this up a long time ago and I've barely put it down since buying it, it even accompanies me to work sometimes when i need that extra bit of eyeliner to get my through a tough day, you know the feeling?

050

Its amazing, super creamy, long lasting and smudges so that there isn't too harsh of a line. I'm a HUGE fan.

026

Next up is Sabbath, the blue of the bunch and a colour that I hadn't tried before.
This has been a great addition to my collection as I don't own anything like it, and for my daily work make up I wear a lot of nudes.The blue is the perfect colour to shake it up without being black, see below for proof!

005

006

I love the flash of colour you get on the upper lid but its still wearable to work, my new fave!


Lastly is Smoke, the deep grey of the set and another colour i hadn't used but was excited to. After hearing that it went so well with the Naked 3 palette which is also new to my collection it wasn't too hard to put it all on just for the sake of it and coo over how brilliantly it blends.

028

This creates a much softer look and truth be told, i should definitely be wearing this to work instead of Perversion. But screw it, black eyeliner is a necessary essential sometimes.

Smoke blends beautifully and true to their word the UD girls were right about it complementing the Naked 3 palette which contains a lot of rose gold colours. The grey is nowhere near as harsh and for most of the looks you can create with Naked 3 the grey is the first choice.

078

029

030

Here they are swatched on my hand without and then with flash. All of them are really wearable shades that can be worn day or night and can be blended out with their 24/7 blending brush (post coming soon!) for any kind of look.

I can see me lusting after many of the shades in the extensive collection. There are a number of green and blue coloured metallic pencils on my list and thats not even starting on the essentials; gold, silver and purples to go with my hazel eyes. With 49 currently available on the Debenhams website along with a whole host of other double ended and limited edition ones I can see this being an expensive addiction at £14/15 each which is why i was so attracted to this set to begin with.


Will you be snapping this set up as well? Which is your favourite coloured pencil?

I have no idea where to start with buying them al but I will have to begin soon!


L xxx


If you enjoyed reading this post and would like to see more from us, you can do so via the following links!

GFC     BlogLovin'     Twitter     Instagram    
SHARE:

Friday 17 May 2013

Review: Smashbox Smoke Box Eyeshadow Palette


Who doesn't love a smokey eye??
I think they're a staple look for any girl wanting to have a more dramatic look.
You can do a nude smokey eye for those times when subtlety is needed, go dark and mysterious with greys and blacks, pop with a flash of colour and sparkle the night away with metallics and glitters.

It's probably the most versatile look in the make up book!

Smashbox have brought out the absolutely wonderful Smoke Box which when I saw in CCO in Swindon's McArthur Glen I just had to snap it up.


Firstly the outer packaging looks really simple and I love that they show an image of the contents, it's always good to get a peek of what you're paying for.

I also love the 'colour wheel' type strip along the side showing the colours inside the palette and these are pretty true to form, aside from the metallic ones which don't have their metallic bits on!


The palette itself is as sleek and simple as you've probably come to expect from Smashbox. Similar to Mac they tend to leave their products do the talking and most people would agree that they 're both pretty awesome, so simplicity is key!


It may seem gimmicky to some, but I think keeping up to date with technology and putting a QR code on the back for a Get The Look video is pretty good. YouTube is booming with make up tutorials and its another way for publicity and getting products across to new people.


So inside the palette.

Above you can see there's a mirror that fills the entire size of the case, this I love!
Can always use a mirror like this when you're on the go which is perfect with this palette for day to night looks after work etc.

It also comes with a mini brush which I always ignore. I ignore them mostly out of habit as they're never big enough for holding product to get the look that you know you can achieve with bigger and better brushes but I keep it there for emergencies.


You can see the names of each colour above, I love Alabaster for a base as it's just slightly lighter than my skin colour so blends in perfectly and creates an even base.
Roast, Thunder and Seafoam are the metallic offerings in this palette with Roast being more glittery than the others. Blackout is a perfect matte black for blending and lining the eyes and blackcurrant is absolutely gorgeous.

The colour are swatched below on my arm.
L-R: Alabaster (almost disappears on my skin!), Thunder, Blackout, Roast, Blackcurrant, Seafoam.


Some colours are sheer like Seafoam and for some reason Blackout doesn't show up at all on my arm but when applied it does show up really dark but not as pigmented as Mac Carbon.

Here are some looks I created with the palette:

Untitled

Using Alabaster as the base, I then applied Thunder over the main lid and Blackout to the crease, before applying Seafoam to the centre of the lid for shimmer.

Untitled

This is a great easy smokey eye sticking to greys and silvers. The colours are really easy to blend and applied smoothly.

Below shows a second look:
Untitled

Excuse my unruly brows here! 
This look uses Alabaster as a base again, Thunder on the inside lid, Blackcurrant on the outer corner and Roast applied to the centre for some shimmer.

Untitled

This look can be worn for day time too and I love wearing it as its not a common colour but does look really nice and I get lots of compliments on it.

I do sometimes get some fall out from the product but luckily it doesn't stick to my face and brushes off easily but this can be annoying.
I feel like these pictures don't do the colours any justice though, Blackcurrant is a beautiful colour, as is Roast, Seafoam and Thunder.
Blackout could be more pigmented but when applied to the eye properly it does come out quite black.
Alabaster is a beautiful colour particularly on paler skin as it is a perfect base and blends in perfectly!


Have you tried any other Smashbox eye palettes?
Which is your favourite?


L xxx


SHARE:

Wednesday 13 February 2013

FOTD Red Toned Smokey Eye

So who over indulgded in pancakes last night? Until last year I was never a fan. Then I started making pancakes american style!!! MMMMMmmm so much better. I'm planning to have my pancake day next week. What's your best topping?

Anyway on to today's post. I've decided to do another step by step FOTD. You can see my first one here. That one was my go to every day make up. A few people said they preferred the step by step way so here is another post.

Here are the products I used.


I started by applying a base of  Revlon PhotoReady Perfecting Primer (here £11.99) mixed with Stila One Step Correct Primer (here £24). I love the combination of both of these and regularly mix products. Especially foundation. When I want a flawless finish I always grab my Revlon ColorStay Foundation (here £12.99). I find this foundation perfect. It applies well doesn't look cakey and really lasts. I use my Real Techniques Expert Face brush (here £9.99). This is by far my favourite foundation brush. It's soft but dense.


To conceal under my eyes and my spots using Benefit Erase paste (here £19.50). I love this concealer. It's thick, covers everything, lasts but doesn't settle. To set my make up I'm absolutely love the Natural Collection Loose Powder (here £1.99). I love this powder. It's really soft, fine and looks natural on the face. I use my Real Techniques Setting Brush (here £8.99) for under the eyes and around the nose. I find using a smaller brush makes such a difference to how my make up looks by the end of the day. Then I use the Real Techniques Powder Brush (here £12.99). I love how soft and big this brush is.


On my brows I used my Benefit Browzings (here £22.50) I really like this but even though it's the light shade I do find it a bit dark some days. I'd love to find a product with a lighter coloured wax.


On the lids I used my mini Urban Decay Primer Potion (here full size £15.50). I do like this but I feel like there are other ones just as good for a lot cheaper so I'm just trying to use it up. I've been waiting ages to try out my Illamasqua Pure Pigment in the Shade Fervent (here £15.50) I love this shade. It's the first pigment I own. It's red/brown in some lights with a green/turquoise shimmer running though. I'm impressed with how these apply. Not at all messy as I expected. I really want more now. How do the Barry M dazzle dusts compare? Have you tried either?


I blended Mac Cranberry Eye shadow (here £12) I seriously love this eye shadow. I never thought I'd use a red eye shadow so much but I actually use this most days. It's surprisingly wearable. This was my first mac eye shadow and now I want more. I'm turning into such a brand girl. Believe it or not until last march I didn't own a high end make up item. L changed all that for me!


To smoke it out a bit more I applied Blackout  from my Naked 2 Palette (here £36). This is a perfect Matte Black, Natural Collection have a really good matte black shade too. I'm so excited to see MUA bringing out a version of this palettes. I will definitely be picking that up once the spending ban is over. I applied it the outer third of my eye and blended it. I also applied it under the eye.


To finish the eyes I applied a slick of black gel liner. Of course the Maybelline one (here £7.99) This is the best gel liner in my opinion. It's so smooth and lasts amazing. Mines getting low so I'm trying to use up normal eye liners and save it for when I'm going out. Stick eye liners just don't compare. I can't wait till the spending ban is over to pick up the other black shades of this. Especially the purple. I added 2 coats of  Lancome Hypnose Doll Eyes Mascara (here £21) I really do love this mascara but I don't honestly know if it's worth the extra £13 over my beloved Maybelline Colossal Volume.


I won a twitter competition before with Bourjois and was lucky enough to win some of there lashes. These are the Faux & Fabulous Lady in Black (here £7.99)


I've never used a half lash before. I love how these add subtle volume to the outer corner. I was worried you'd really be able to tell but they nicely thickened the outer lashes. I'll be picking up more half lashes to try. They also have black crystals on so are great for special occasions.


For cheeks I used my favourite duo Benefit Dandelion (here £23.50) and Liz Earle Healthy Glow Bronzer (here £19.50). I have reviewed both of these recently so won't say much about them. If you missed those posts you can read them again on this link.


I finished with Mac Angel Lipstick (here £14) with a smokey eye this is a perfect pinkey nude lip. It's subtle but still looks done. I feel strange without a lipstick now.


I really love a red smokey eye. I think it's a little different to the normal grey's and blacks. I want to try more colours from my collection and smoke them out. I want to get back to being brace with eyeshadow.


I really like the lashes on. I can't wait for a night out so I can wear this. 

Wow long post. Hope you liked it. I included links and prices to all the products this time. Let me know if you prefer posts to have links to all the products. I'd love to know what you think of posts like this as I'm enjoying doing make up looks but they make for long reading.

I love playing with my make up, I need to do it more and experiment. What's your favourite eye look for a night out? Do you stick with what you know? I think I need to buy a big palette after the spending ban.

Love M

xxx


SHARE:
© The CSI Girls. All rights reserved.
Blogger Designs by pipdig