Saturday 11 June 2016

DIY: Coffee Scrub

Hey All

Coffee scrubs seem to be everywhere at the moment, a great natural exfoliator that not only helps soften skin but also helps with cellulite. With summer now hear the coffee scrub trend was something I wanted to try out but to be honest didn't want to pay the price for. They seem really expensive for something which is basically oil and coffee so I decided to make me own.

DIY Coffee Body Scrub


To make your own coffee scrub you'll need

  • Ground Coffee (ps poundlound sell!)
  • Sugar or salt
  • Oil (I used coconut oil but sweet almond or anything would work too, ps if you're using coconut oil you can get cheaper one's that aren't suitable for cooking but I already has this one in the cupboard)
  • Bowl
  • Tablespoon and cup
  • A jar to store it in
  • Essential Oil (optional!)


DIY Coffee Scrub

It really is amazingly simple you mix the dry ingredients depending on how much you want to make, I did 1 cup of ground coffee to 3 tablespoons of sugar.

DIY Coffee Scrub

 I then added sweet orange essential oil, though I'm not sure I'd bother next time as you can smell it slightly (I added loads!!) but I think the coffee is so strong it's not worth it. Peppermint or tea tree may work well though.

DIY Coffee Scrub

Next up melt some coconut oil and mix it all together. I used 5 tablespoons of coconut oil but it may take more less so add it one tablespoon at a time and mix. 

DIY Coffee Scrub

DIY Coffee Scrub

Lastly add to pretty container or old jar! Much cheaper than buying it and makes a great gift for friends!!

DIY Coffee Scrub

So far I'm really enjoying using it. It leave my skin so soft and the coconut oil adds moisture! It does get messy in the shower but it's worth it!

Have you made your own coffee scrub or tried coffee scrubs?

Love M

xxx


SHARE:

Saturday 14 February 2015

Life


Hello!

Today's post is a mismatch of photos I've taken over the last few weeks of places I've been and things I've eaten. I've got a lot better at not taking pictures of everything I eat when out but sometimes, it's just got to be done!

First up I'd like to congratulate myself and announce that I have finally paid off all of my debts. This includes my credit card (ENDLESS!) and also the money I borrowed from my parents to pay for my car and then all of the subsequent things that went wrong with it plus the insurance and tax that I couldn't afford from having still not paid the original money back - phew.

This means I can finally get on with my life and start savings for real! This is exciting and I can't wait to have some savings to fall back on in future and save for things like holidays and moving out.

Untitled

I cannot wait to move out but I'm not going now until I've got enough to buy my own place - no point wasting money renting for a few months. I love going to vintage fairs now and my mum mentioned Cardiff Indoor Flea Market so we HAD to go and check it out. It's basically in a warehouse but it's a permanent fixture and they had loads of pretty much everything!

I loved that even though it was full of so much stuff they still had some coloured flags and bicycles hanging from the ceiling! It's a very cold place as it's not insulated at all but it's quite happy and busy too.

Untitled

Untitled

The furniture in there was amazing, so many old wooden pieces that I would love to get and do up myself. I know where I'll be going when I get my own place!

At home I've had to do some DIY - the inside of my fixed wardrobes were pretty much outside wall and have been letting in damp. They've been there for 33 years and we've lived in this house for 16 but of course my dad decided it had to be done NOW.

It took FOREVER to empty out the clothes and make up residing inside but if I'm honest, the real issue was the books. I'm such a hoarder of books that its a bit ridiculous but the number one thing I want in my house is a bookshelf so I'm saving them up! Here's the disaster I came home to one day after work....


Untitled

What a nightmare! After a few days it was dry and I had to move everything back again, decorating is hard work but you don't even get to see this work which is even more annoying....

I've been trying to start reading again. I failed miserably with my plan to read more last year so this year I've set myself the target of reading a book per month - this way its doable and I can hopefully make a dent in some of the books I have.

This was a murder mystery that my neighbour leant me and my mum and one Friday things had been so exhausting throughout the week that I sat there with my tub of Nutella (with my name on obviously) and proceeded to eat 1/4 of the jar....whoops!

Untitled

Normally a spoon of it does the trick for me and it curbs my cravings any further but that week was particularly draining and I went a bit crazy! Made me feel so much better though so I'm convinced it's what the doctor would have ordered....

Another change I've made in my room is finally getting a picture up. I've wanted a globe of the world for absolutely ages but can never seem to find one in sepia tones that I can afford....I found this print and frame in ikea for less than £20 and I knew I just had to get it. It's a map from 1881 so it's not correct at all but that's what I love about it even more. I stare at it all the time now, making a mental wishlist of where I'm going to go :)

Untitled

I've finally signed up for Women's Health again after my subscription ran out mid year. I managed to get a good new year deal so was really pleased, I'd fully recommend it for anyone who's the slightest bit into health. It's got lots of fitness in it but also beauty, clothing and interviews with people like Britney, and who doesn't want a flat stomach like hers??

Untitled

I recently realised that my hair has grown loads - look at the length on this! My hairdresser dyed it at Christmas for me but didn't have time to cut it so I drove to her house after work, she put the dye on and I drove home and washed it off myself half hour later! I looked a right mess in the car haha.

Untitled

By the time I got it cut this time I really felt like the ends were a bit heavy so I also had a few layers put in so that it's not all one big block of hair - even straightened it looks a bit straggly which isn't a good look!

Untitled


Untitled

Lastly I've been looking into creating my own palette like the one above. I have a few of those colours but if you have any suggestions for me then please send them my way.
I've recently bought Brule and liked it but it wasn't the white highlighter I was looking for, the more I look into the colours the more I find I need!

You can never have too many nude coloured eye shadows can you??


What have you been eating and drinking this month? Did you manage to make it through Dry January without a drink or complete a month of a clean eating diet?

I think aside from my slip up with Nutella I've not done too badly....


L xxx


SHARE:

Thursday 4 July 2013

MAC Palette and Depotting


I'm sure most of you will agree, owning a full MAC palette is 100% a life goal for a beauty obsessive.

I mean you only have to watch a few Tanya Burr videos or google it to know that they are seriously hot property!

142

Over the years I've picked up a few individual eyeshadows from MAC that I sometimes forget about, so I thought it was about time I got myself a palette so I can see all of my shades and use them a lot more.

I was also hoping having depotted them I could use them as a 'Back to MAC', as the rules are unclear as to whether you need the silver pan inside or not and it seems to depend on the MAC artist!

When I made my order I picked up the new double sided palette and also one insert so I could put my eyeshadows in and leave the other side for future purchases.

075

The palette is pretty standard in terms of shape and size but I like simplicity and MAC does this perfectly.

You just push the insert into the palette and it clicks into place firmly and there's no way it will be sliding around.

077

084

There is also a clear plastic divider which is helpful in stopping products from transferring over to the other side and falling all over the place. This would be a great help if you didn't have the insert as well as you can in theory get away with putting more products in without the insert.

086

092

You can see the other side without the insert in the picture above and it sure does look like a place that needs filling!

144

So after watching Fleur de Force's YouTube channel I found out how to depot the pans of eyeshadow from the original containers. As you can see I've built up quite a random collection, some nudes, some blues and purples, and some shimmery blacks. A few were bought for me as presents, so I can't wait to buy some more to make it a more seamless collection!

109

Basically as a quick run down you'll need a knife, straighteners, greaseproof paper and some magnets, like you find on the back of fridge magnets.

Use the knife to slide into the front of the pot where you can pop up the part of it holding the pan, like the 2 on the left in the picture below:

107

Place the greaseproof paper onto the hot straighteners and place the part of the eyeshadow pot on top, hold it down for 30/40 seconds and you should be able to pop out the pan from underneath using the knife when the plastic is soft enough.

As the glue will be soft be careful as it might burn, but carefully apply a small piece of magnet using the glue.

You can then remove the label from the case using the heat and stick it on top of the magnet using a bit of the same glue (it's quite stringy!) and then you'll be able to keep the correct name with the correct pan.

You can then put all of your pans wherever you like and they will stick using the magnets and you can rearrange as necessary.

I've arranged mine as follows:

121

I'm hoping to pick up a few more over the next few years so I can have a 'nude/daywear' side, and then a funkier bright and glittery side so I can maximise my looks.

135


If money was no object it would also me amazing to get another and fill it with blushes, bronzers, MSF's and powders for the ultimate in travel make up!

I'm so pleased I finally picked one of these up and it has definitely made me use some different colours for a change.

The palette itself is the new double sided large palette and costs £18, and the insert for the eyeshadows costs £6.50. The eyeshadow pans themselves cost £10 instead of £12 so you can save money by buying only the pans if you have a palette.

Do you have any suggestions for eye shadows i should get? Have you got a similar palette? Have you depotted your individual products into it like I have?


My quest for the ultimate palette begins!


L xxx


SHARE:

Tuesday 25 September 2012

DIY Wedding Planner Book

Hey All

I fancied doing a bit of different post for you today. I love doing all things crafty and used to make a lot of my own cards at one point.

One of my friends from back home got engaged recently. Her boyfriend text me a few days before to let me know he was going to do it so that I would go down and visit them that evening.

After spending a good 8 years discussing what our future weddings would be I wanted to get her a special useful present. I thought a wedding planner would be a great idea so she could keep all her ideas, appointments and details all in one place.

Due to only have 3 days to get it, I knew online shopping wasn't an option so I started to look up and down Cardiff centre. I found myself quickly disapointed with what was on offer. Tacky covers or not worth £20 for a plastic folder.

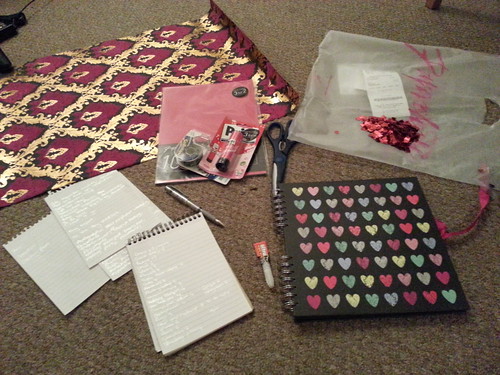
I decided then I'd make it, I could personalise it, have it tailored to her and it would be how I wanted. After an expensive trip to paperchase (who knew glue was expensive, I had no time to raid cheap shops as it was Friday evening I got my supplies and started making)

DIY wedding planner engagement gift

As it was a Wedding planner I picked the heart book which was around the £9 mark. It has black pages which I though looked nice. I picked up heart confetti to decorate the book and pages with, The pink and gold paper was to decorate title pages and I also got document holders, pritt stick, a silver pen and sellotape, The pink was cheaper and seemed appropriate.

My first task was to count the pages in the book and think of all the headers I needed. For example I had dress, food, venue, budget, catering, menswear, flowers, table decoration, photographer, entertainment and a few other.

DIY wedding planner engagement gift

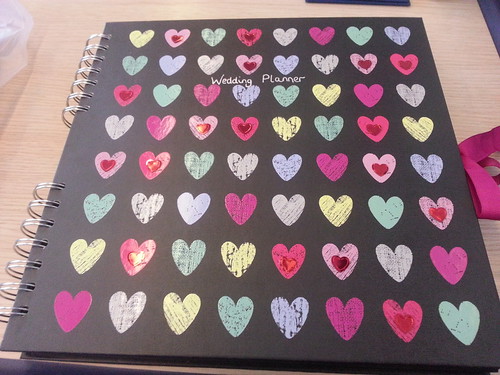
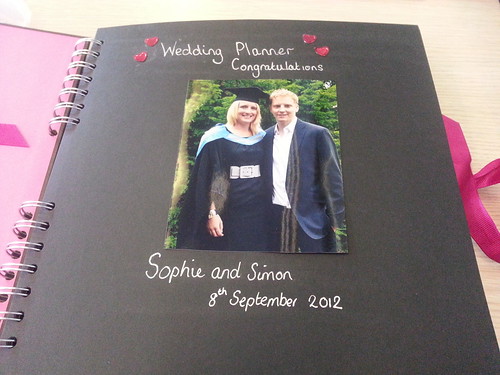
I started by writing wedding planner on the front of the book and sticking little confetti hearts in the middle of the hearts. I really liked how this book had a pink tie to keep it all together too.

DIY wedding planner engagement gift

You can still slightly see the guide lines here where I haven't fully rubbed them out. For the first page I got a nice photo of them and wrote the date of the engagement.

DIY wedding planner engagement gift

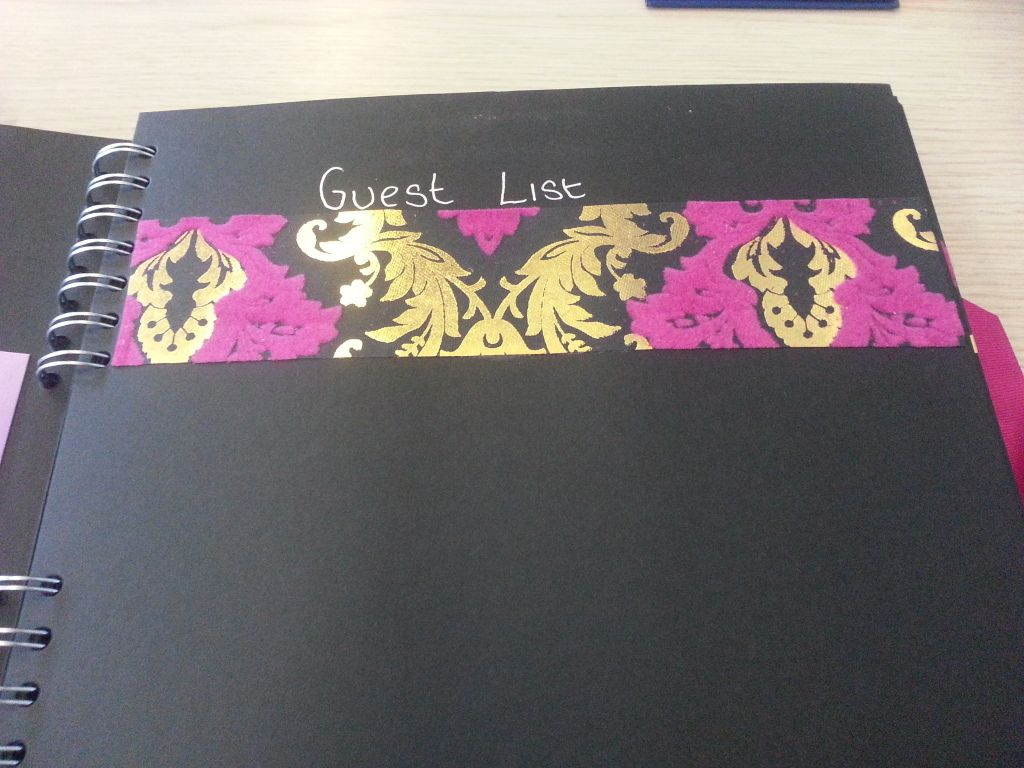
For each of my header pages I wrote the title for the section and used some of the pretty fabric paper to make each page look nice.


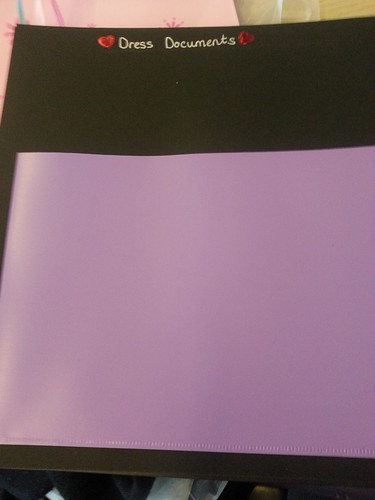
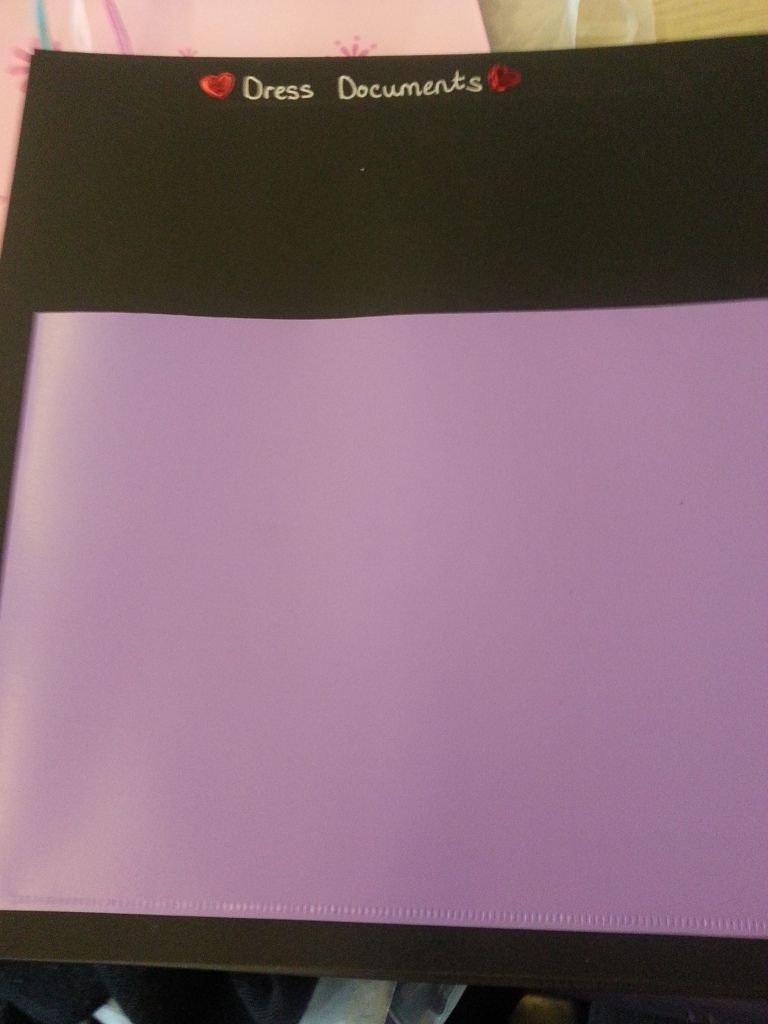
For each mini header I wrote a small title at the top of the page and put hearts either side so she would have plenty of room to write. For each category I thought of I then thought of the sub categories she would need to think of to complete that. For example for the dress I had pages for inspiration, shops and appointments and dress documents, For catering there were places to visit, tasting and final menus. (People think when someone proposes to me I'll be a bridezilla, I have no idea why, I just know what I want and the little details matter ha!!!)

DIY wedding planner engagement gift

For sections I thought that needed documents I cut the A4 document holders in half and stuck them down. I thought having these would make it easy and then everything she needed would be in one place.

I was so pleased I made it as my friend really loved it and said she couldn't believe I had done it all for her so quick. She is now well into her wedding planner and has told me the book is well used.

It's made me want to do more handmade gifts. I think they can sometimes be more special.

What do you think of this? Are you married? Did you have a book? Is it wrong to make myself one just for inspiration ;) I could be like Monica ha!

Love M

xxx


SHARE:
© The CSI Girls. All rights reserved.
Blogger Designs by pipdig